In the comments on my last post about the Battle of Longchamps, Jonathan mentioned that the French should ask for a rematch (an excellent idea in principle--any reason to play is a good one!). Digging around, I found some illustrations of one of the convention games of this battle that I hosted (I believe it was at the US Historicon Convention in 2008--sheesh, where does the time go?). For our UK visitors, this was a participation game (all US convention games are participation format). As usual, clix pix for BIG PIX.
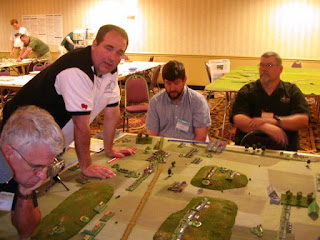
One of the players in the 2017 game was also in the 2008 game: AJ (pictured above in the black and white club shirt). In 2008, he played the opposite role that he did in 2017. Then, he was Gravenmoer, commander of the Grand Alliance left (in 2017, he was on the French right as Gourney). That game was a nail biter that went to the French. Seems to me that in both games, AJ wound up on the wrong side of some bum dice. In the case of the game in 2008, his play managed to stabilize the situation on the GA left and prevent a complete collapse (no small feat given the circumstances).
For a description of the situation, please refer to the previous post. For quick reference, here are the schematics of the starting positions:
Grand Alliance French
The 2008 game wound up being the classic "pinwheel of death" with each right wing pushing forward against the opposing side's left.

Above, the battle on the French Right. Here, AJ was in command of the Grand Alliance (to the right in the picture). The image captures the moment when the French Horse contacted the Grand Alliance Horse. The Grand Alliance infantry are still advancing towards Leuze, but have prepared a precautionary line facing to the flank, hinging on Hanrot. This would prove to be a smart move. The French Horse would overturn the Grand Alliance Horse, forcing the Grand Alliance to commit its reserve, including its reserve Horse Brigade to cover the exposed Grand Alliance baseline on the left. This reverse would also cause the Grand Alliance assault in the center and center right to stall. As a result, Leuze would remain in French hands, and the French second line infantry on the main position in the center would be able to shift to support the French left in the Longchamps sector, which was under tremendous pressure....
The view of the cavalry collision from behind the Grand Alliance Horse
...Meanwhile, on the other side of the field...
...the Brandenburg infantry and horse of the Grand Alliance Right Wing on the march to assault the French Left.

The overview of the entire action. The Dutch Horse division followed the Brandenburg Horse around the right. These would collide with the two French Horse divisions. In the ensuing fighting, the Grand Alliance Horse would push forward, exhausting the two French Horse Divisions, and the Dutch Horse Division would go exhausted as well. The Brandenburg Horse Division continued the assault and was on the verge of breaking through behind the French position (see the line at the tip of the axis in the center/right of the above). At that point, the French sent in their only remaining horse, the Brigade of Carabiniers from the Army Reserve. The ensuing combat inflicted enough hits on the Brandenburg Horse division to put it over the exhaustion limit, preventing it from pressing forward further--the allied assault ran out of steam there: a near run thing! The French dared not risk further assaults with their one remaining horse brigade, so each side faced the other at that point. Meanwhile, the infantry of the French 2nd line on the main position had moved down to support Longchamps. The Grand Alliance assault on the hill on the French left made progress, forcing the French left back at a right angle to the front, but stalling there. The hill would remain contested, neither side being able to claim possession (final positions are sketched out in the above image). The infantry of the French reserve would be committed to extend the line back from the hill. If the Grand Alliance had not been obliged to commit its reserve to stabilize the left, it might have come up to decide the situation. However, at this point, both sides were completely committed with everything in the line, neither having any reserve left. Under the circumstances, launching an assault on some other point of the French position and risking a reverse that would leave a hole in the line would have been a risky proposition for the Grand Alliance. Although this battle went to the French, it was a nail biter. Both sides managed their reserves well and so were able to stave off potential disasters and stabilize their positions. The intervention of the Carabiniers on the French left was a moment of high drama--had the Brandenburg Horse not run out of steam at that point, the French left would have been severely compromised and the Grand Alliance probably would have been able to take the hill and Longchamps.
This battle report illustrates the importance of managing the reserve in this system. And it was also not a bad outing for the Rodney Dangerfield of eras!
Excelsior!


Beautiful looking game and great report.
ReplyDeleteLooks great, love your enplanations and maps...
ReplyDeleteEd, I like the arrows showing the flow of troop movements. Gives your BatRep a good sense of dynamism and makes the action easier to follow.
ReplyDeleteIndeed, I heartily approve of the arrows in following an AAR. Also heartily approve of French victories being the staunch Francophile in our wargaming group.
ReplyDeleteMy hair line was 1" further forward back then!
ReplyDeleteFunny: my waist line is 1" further forward than it was back then! Something is going on here...
Delete