Tuesday, June 18, 2024

HUNGARIANS V AUSTRIANS: CHOCOLATE BOX WARS PLAYTEST


Mid-battle perspective from the Austrian battery looking towards the center.

Keeping up the momentum on the development of the Chocolate Box Wars (CBW) rules, I managed to run another playtest last weekend. To be able to compare outcomes, I retained the scenario, terrain and force structures of previous playtests, but for variety, I brought out my Hungarians and Austrians, setting this game in the Hungarian Revolt (1848/49). As usual, in this post, you may clix pix for BIG PIX. 

The Hungarians at start ready to be deployed: 4 Line Infantry Bns, 1 Jager Bn, 1 Grenadier Bn, 1 Auxiliary Volunteer Bn (German Legion), 1 Line Cavalry Rgt (Hussars), 1 Squadron of Freiwilliger Jager Hussars, and 1 Field Battery. 

The Austrians: The same force mix except that the cavalry mix was a Dragoon Rgt and a Hussar Squadron, and the Auxiliary Volunteer Bn was a unit of Freiwilliger Jagers.

A closeup of the cavalry contingents. Above left, the squadron of Hungarian Freiwilliger Jager Hussars (repurposed Red Hussars from the Foundry Maximillian Adventure Line). Above right, Austrian Hussar Squadron in the foreground and Dragoon Regiment in the background (Northstar 1866 figures).

For this game, I added one more tool. These are 12" measuring sticks, marked off in 4" (the base), 2" and 1" segments. This calibration and length will handle about 90 percent of the on table action (short range is 4": long range for infantry is 12"--all movement is in 2" increments, and only cavalry move more than 12"). I made one up out of a round dowel and another using a square one. It turned out that one player, AJ, used these (he preferred the square), and the other, Rob, stuck to the tape measure (old habits...). So the jury is still out on these. At the very least, I think this playtest validated their utility; their use is more a matter of preference than function. In other words, I'll keep 'em and bring them out for future games. 

Making a return engagement from his role as the Danes in the last playtest, AJ took up the Austrian cause. 
Making his first CBW foray, Rob surveys the field and deploys the Hungarians. 

The view from my facilitator's chair as both sides make opening maneuvers.

AJ pushes the Austrian right flank forward.

Rob counters by bringing up the Hungarian left wing forward. 


With the Hungarian flank infantry battalion having a hit marker (the black cube) and multiple activations, the table was set for cavalry action: AJ pushes the Austrian Dragoons across to try and catch them before they can recover. But Rob reacts with the Hungarian Hussars (just visible in the lower right hand corner)...
...who would take lumps in the exchange and from fire from across the river, but put multiple hits on the Austrian Dragoons, who AJ then pulled out in a Retire and Reform action (above right). The Hungarian flank situation stabilizes. This vignette was an important one not just for the game, but for the playtest. The way it unfolded validated the mechanics behind the core tactical concepts (thankfully!). 

Meanwhile, things continued to develop in the center, and both battle lines started to form across from each other at the bridge. In the above right, the Austrian Grenadiers are seen steadying the line.
Unfortunately for Rob, their counterparts, the Hungarian Grenadiers, had been dispatched to Valhalla by then; a sign of how things were going in general.

A closeup of a brown-jacketed Hungarian Honved line infantry battalion stoutly holding the bridge (conversions aside, the Hungarians are former Steve Barber, now Keelmen Miniatures, figures).
A reduced Austrian Line Battalion facing the Hungarians in the center (Austrian line figures are repurposed Perry British Intervention Force infantry in 1855 shakos). 
The German Legion holding down the right end of the Hungarian position (figures are converted ACW Perry Iron Brigade).
Moving across the support the center, Austrian Volunteer Freiwillger Jagers (figures are converted Steve Barber/Keelmen minis infantry in porge cap). 
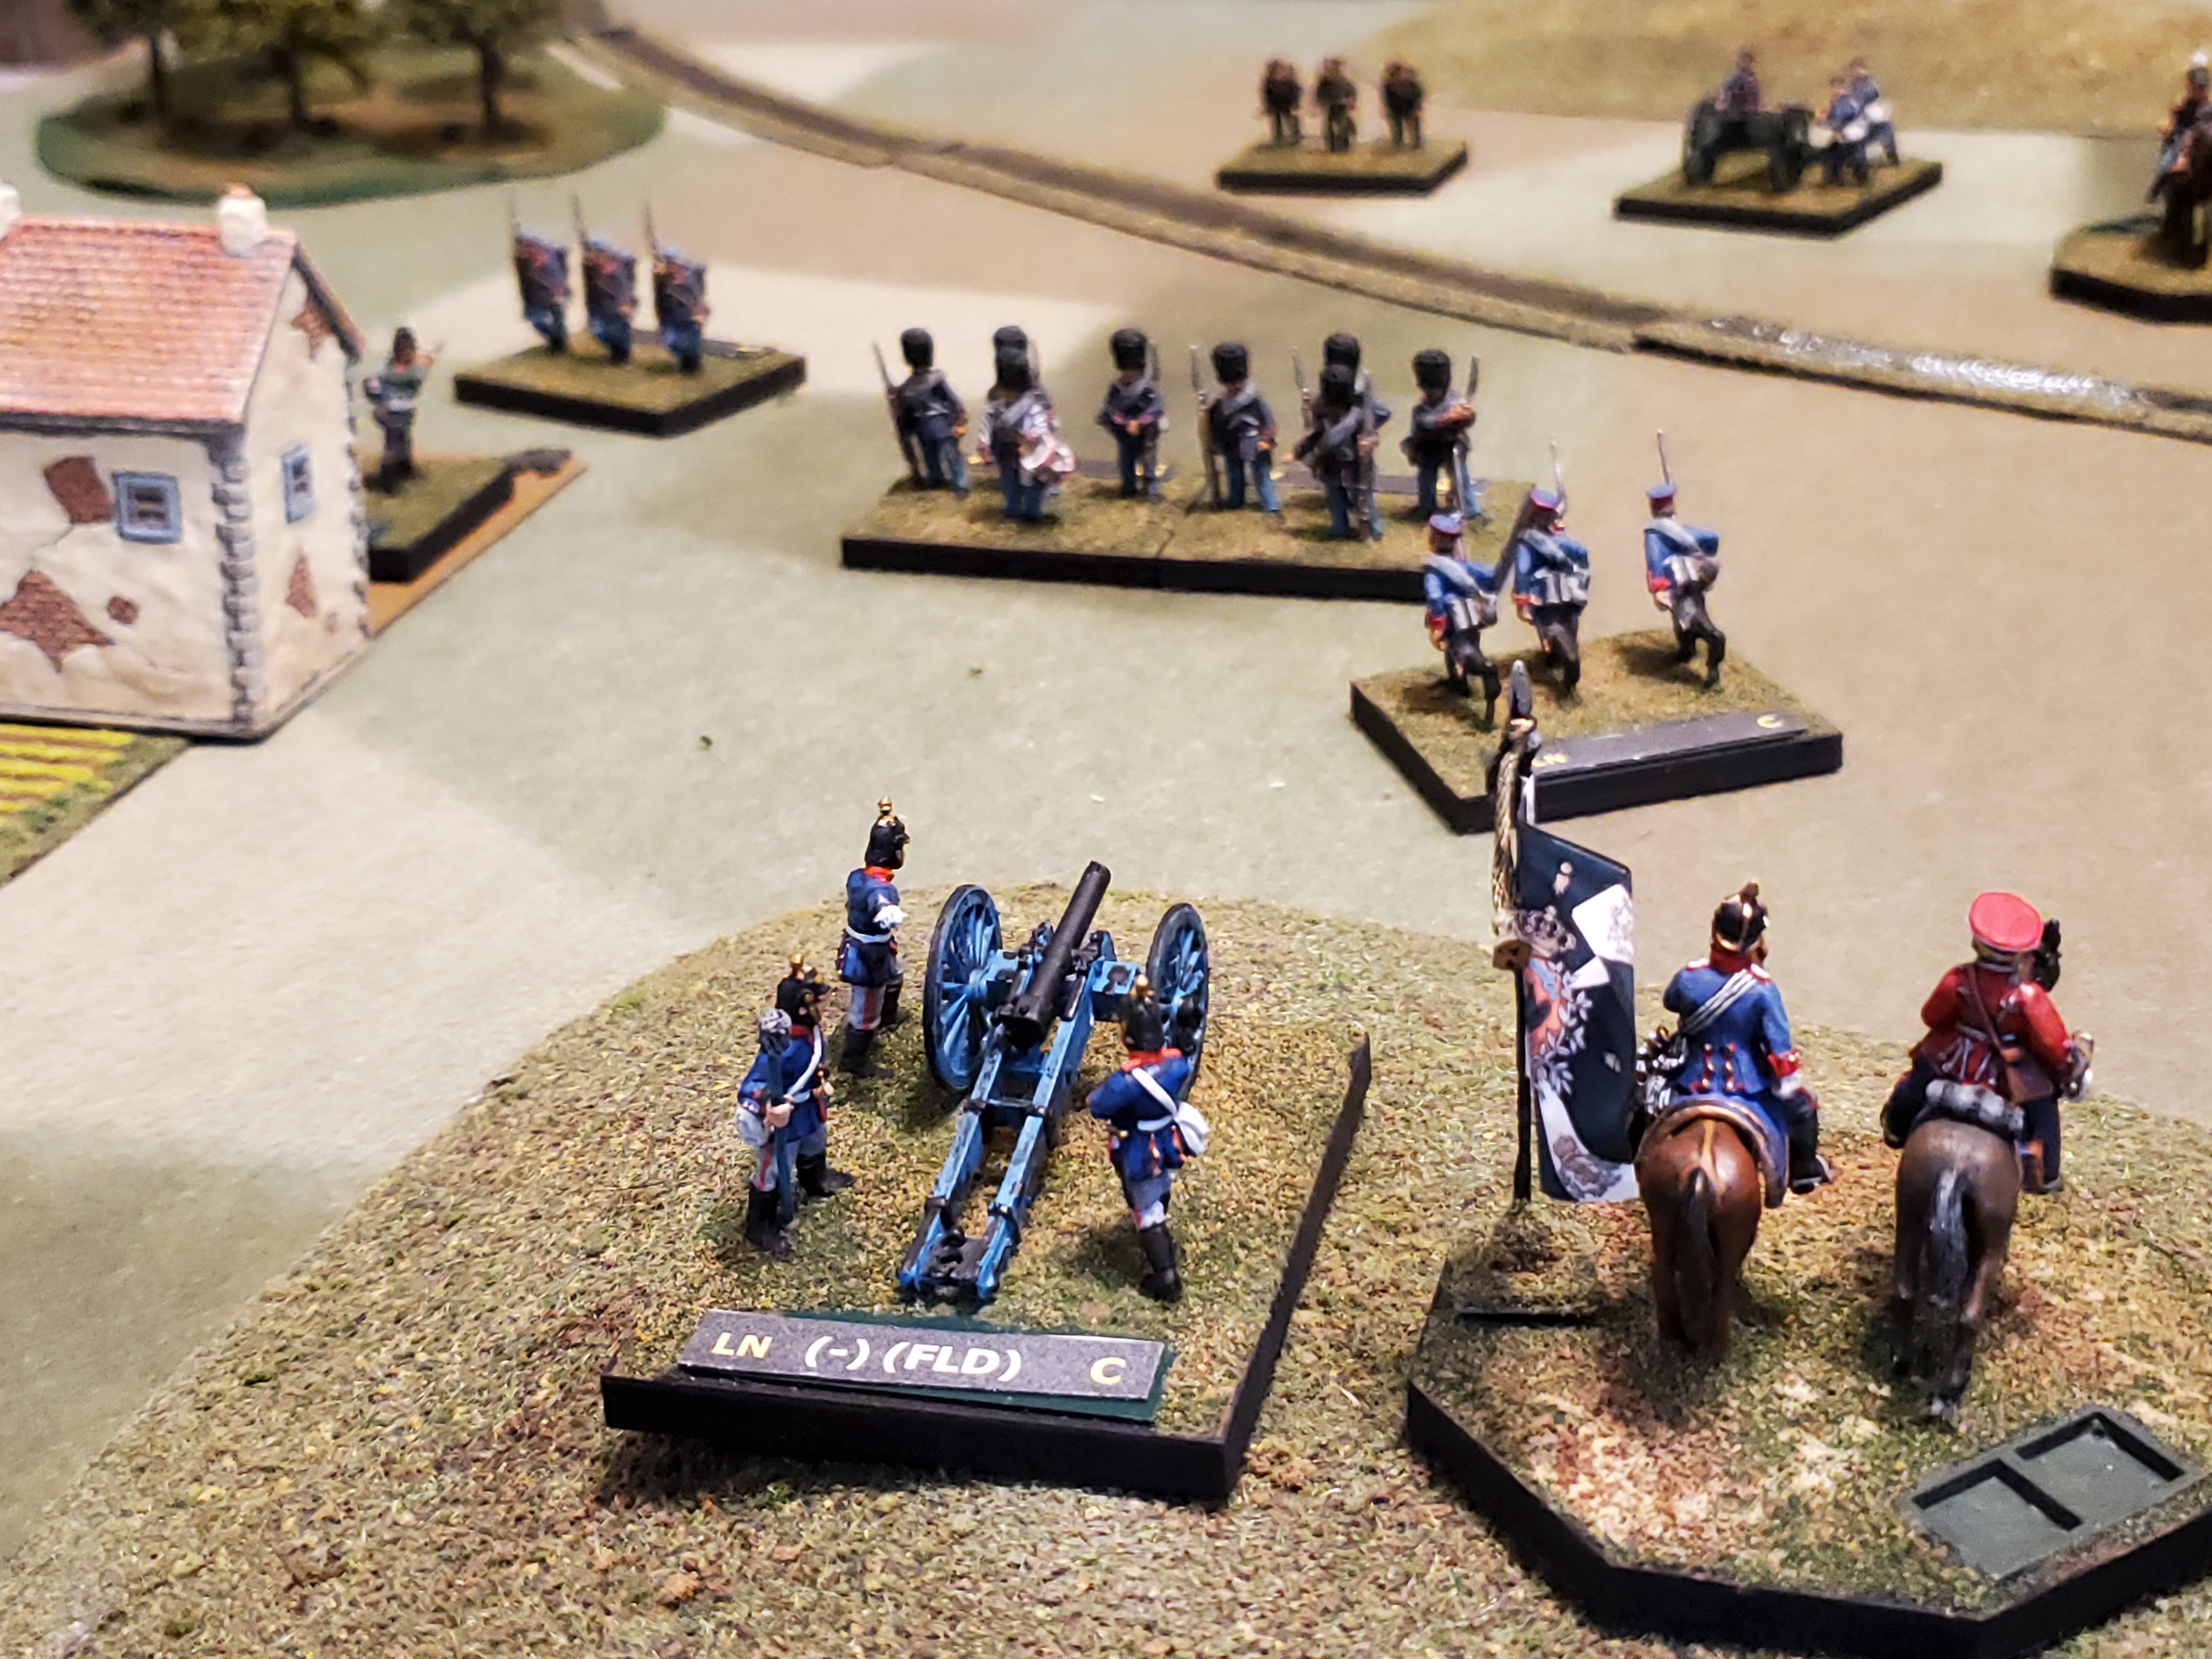
A shot of a candy striped Hungarian gun carriage, no Hungarian Revolt battle report would be complete without one. Figures are converted Northstar 1866 Austrian gunners.  

The situation at the conclusion of the playtest. Although the Hungarians still held a coherent position...
...the butcher's bill had been heavy (Hungarian dead pile, below, Austrian, above). The Austrians had certainly suffered losses, but they were distributed down the line and AJ had been able to do enough rallies to keep from losing stands. Rob was unfortunate in that hits against him came in bunches before he could rally them off (General Dice was not with him this day).  The Hungarians at this point were within two stands of being exhausted, so we called it, having achieved the objective of the playtest--a few more lessons learned and a few incremental changes to try for the next game. Otherwise, things are looking good. 

So good, in fact, that in the room down the hall, Gracie even took notice and opened her eyes. Rose, on the other hand, was neither disturbed nor impressed (we call it the guest room, but you can see who really owns it).

Excelsior!

Thursday, June 13, 2024

DANES V PRUSSIANS: CHOCOLATE BOX WARS PLAYTEST


The perspective from behind the Danish Command in the Center of the field.

Greetings, dear reader. In this post we report on the second playtest of the Chocolate Box Wars  (CBW) rules system. After playing during the first playtest  using the ersatz print and play troops (no report), I quickly followed up and had two players come over (AJ and Mark D) to play a second game in which I  facilitated and took notes.  Although the first playtest was productive (and fun), I consider this one to be the first "real" playtest of the system: I find that some playing is in order to get a first hand feel for a system, but after that, it is better observe and facilitate to see how players manage the system and to get outside perspectives.  Given the "milestone" of getting this on the table with figs for the first time, I wanted to see my first two CBW armies on the table: my 1st Schleswig Holstein Wars Danes and my Prussians. So I decided to break out the figures and terrain from storage. As usual, in this post you may clix pix for BIG PIX. 

The CBW system is an "army in a box" concept, playable in 4'x6' with a small figure/stand count.  This table was a 5' x 6' (to give you some perspective), so in the ballpark for the system. I used the "tournament" set up system in the rules, in which each side sets up in a zone on its side of the table (marked out above). Given the extra width of the table, the setup zones each were 12" deep (as opposed to 8" in the rules).  
 Looking down the Prussian line (left) and the Danish (right)
Prussian Hussar Squadron and Dragoon Regiment, Awaiting Orders. 

For this game, each side had the basic force: four line infantry battalions, one light battalion (deployed as two independent company units), one guard battalion, one auxiliary infantry battalion (volunteer rifles), one field artillery battery, one line cavalry regiment, one light cavalry squadron, and one headquarters. A grand total of 42 infantry figures, six cavalry figures, three gunners with one gun, and a headquarters vignette. Yet the table did not look empty (I'm happy to say). 

I also tested out some new tools that I had created to assist with play.
                        Spacers:       1   Stand Wide             1"  Between Units 
Fire Zone (One Stand-Width to Each side) 

In the CBW system, units must maintain a 1" distance to other units. Rather than fire arcs, units have straight ahead fire zones described by a rectangle extending from the front face of the unit to one stand-width to either side, and forward out to the maximum range. These spacers, one stand-width wide and 1" deep, turned out to be very handy, making unit handling much easier. 

Vintage 10 Pfennig Coins (2nd Reich, circa 1871 to WWI). 

I've already described my scheme for using vintage 1 pfennig pieces for activation markers. While picking batches of those up, I also wound up getting a good number of nickel/silver 10 pfennig pieces (they are about twice the size of the 1 pfennig).  I used these as exhaustion markers (half of stands lost equals defeat. In this game, each side had 18 stands--so each had 9 of these 10 pfennig exhaustion markers).  And now, on to the pix of the game.
The players completing setup: ready to go!
AJ (left) played the Danes. The Danish Line advances. The 1 Pfennig activation markers, seen behind the units, worked well once again.
Mark D (left) played the Prussians. The right end of the Prussian line advancing.
A synopsis of the action (as seen from the Danish side of the table). AJ had the initiative (was the first active player) and pushed hard on the right, spending his activations there while refusing the Danish left. This gave the Danes an early local numerical advantage against the Prussian left. Mark D (whose dice were hot to start, but then completely abandoned him), countered by maneuvering forces to reinforce his left.  This is where most of the action took place.  The Danish guards were the spearpoint of the advance, facing off against the Prussian guards (who were eliminated). AJ had some very good rally rolls which allowed his heavily committed units to recover hits and continue fighting--while Mark's rally rolls went AWOL, so his engaged units withered under the pressure. 
A closeup of the action on the Danish right. The Danish auxiliary volunteer rifles have cleared the orchard of their counterparts (the Prussian auxiliary volunteer rifles, who had been defending the orchard), while the Danish dragoons work their way (bit by bit) around the end of the line, where the Prussian Madgeburg hussar squadron is waiting to counter them. 
In a day of disappointing outcomes, the bright spot for the Prussians was the performance of the jager company on the left, who held the key village, which anchored the position. They can be seen fending off a Danish infantry battalion that they had reduced by fire and were about to deal another whack to (battalions are one stand when reduced). 
The view from behind the Prussian command in the center of the position. The bearskinned unit in the distance the Danish guard, who have just come out on top in a firefight with the Prussian Guard (who had been in the empty space in front of the Danish Guard). The Guards exchanged blows, but the Danes managed to rally off their hits (AJ's dice were as hot as Mark's were cold), while the Prussians didn't. Meanwhile, the Prussian artillery wasn't shooting well, either, so didn't make up for the deficit.  After that, only a reduced Prussian infantry battalion remains to block the Danish breakthrough.  At this point, we called the game, which was more about proofing the system than winning or losing. In that regard, General Dice's performance notwithstanding, the outcome was a success.  There lessons learned informed some minor adjustments, that we'll be testing out in the a playtest coming up in the next week.  
Excelsior!

Related Posts Plugin for WordPress, Blogger...