Tuesday, February 28, 2023

JOUST FOR THE FUN OF IT: BIG KNIGHTS WIP


Six player 28mm Joust for the Fun of It (JFTFOI) game at our recent Game Night

This post will be a modest update on the progress of upscaling my JFTFOI game from 28mm figures to 1/20 Schleich (mainly) toy knights.  But before moving on, here is an update on the state of the rules. I'm happy to report that I ran a successful six player game at our club's February game night. Four of the six had not played before, to include a visitor who was fairly new to miniatures gaming.  Everyone grasped the flow quickly and the game ran smoothly. In short, everything worked.  I made a few minor tweaks to the game aids based on my observations, but those are mainly cosmetic.  The game night allowed me to proof how I would pack, transport, set up, and run the game at a convention.  So I can now say that both the system and the logistics are "convention ready."  As usual in this post, you may clix pix for BIG PIX. 

So far, I've put together 4 out of 6 of the teams I need. In this post, I'll share the early stages of the project and the conversions.  As far as the guiding vision, I decided that I didn't want to redo these figs, but keep them as close to "stock" as possible, retaining their toy soldier qualities (and also capitalizing on the fact that they are ready-painted--ie, why work harder than necessary?). The main aim of any modifications would be to avoid redundancy between figures and to support the  unifying theme of each team. More on these aims will become evident in subsequent posts.  At start, I was confronted with the very basic problem of how I wanted to mount them. Although designed to stand on their own as toys, they were too wobbly for my likes.  I wanted them to be stable on the table (I like the sound of that), and for the riders and lances to be fixed rather than loose. In short, although toys, I want them to conform to the handling standards we've become accustomed to with our miniatures. 
After much measuring and testing, I settled on 2" x 5" bases.  I also decided on staining the bases rather than painting or flocking them. To get started,  I drilled a hole in the horse and inserted a 1/4" dowel (secured with my go to J B Kwik Weld). I thought that the dowel would be sufficient to support and stabilize the figure on the stand. Unfortunately, this solution lacked lateral stability. 
So I wound up pinning the hooves as well (using the old stand bye of clipping bits of paper clips).  I then drilled a blind hole in the base for the dowel and smaller holes for the hoof pins.  As such, each one of these bases requires a custom fit, so they wound up being rather time consuming.  So far, though, so good. I've done the bulk of them.  
This configuration works very well. The figures are nice and stable and I rather like the look of the stained bases. I found that Gorilla Glue Wood Glue does a good job of adhering the metal pins into the wooden base (and obviously works well for the wood on wood of the dowel). I pinned the riders into their seats and adhered both they and their lances using J B Kwik Weld--I tried super glue, but it wasn't as good given the mix of materials involved.  

Fellow bloggist and friend AJ (of AJ's Wargaming Blog) is one of several in our club who has embarked on 3D printing. He provided me with some custom shields as well as a set of parts for making lances...
...from which I put together jousting lances out of 3mm carbon fiber (at first 1/8" wooden dowels) with 3D printed hand guards and fists for tips . My teams will have a mix of the Schleich jousting lances and these.  Moving on, here are a few of the conversions...

For the Notable Knight on "Team Black" (right figure) I substituted the 3D printed tilting shield for the original one with the cross, adding the dragon head decal using inkjet slide decal paper. There will be a team (yet to be done) that I'm calling the  "Paladins" who will have a crusader and cross motif, so I decided to not also have this symbol on Team Black (who wound up having a unifying dragon motif).  The cross on the original knight is raised and part of the mold, so simply painting over it would not have worked, so I switched it out.   


For the Notable Knight on "Team Red," I mixed the horse from the above left figure and knight from the above right. I did so because they both have the single large fleur de lis symbol. I drilled out the hand on the knight and replaced the sword with the tilting lance. 

For my Notable Knight on "Team White" (it's a coincidence that these all are Notables), I started with this Blue Box knight wielding a mace. I had to cut off and pin his arm in a new position (above right), and then I drilled out his hand and gave him a jousting lance (repainted in the red/white combination).  I also touched up the red and white scroll on the helm, the white on his eagle crest, and added a bit of white trim detailing to the hanging bit on the back (not sure what that's called). 
The Team White Lord (a "stock" figure, left), next to the conversion Team White Notable Knight (right).


This was the most involved conversion. For my Notable Knight on "Team Green" I began with this figure (also a Blue Box figure).  I was not happy with the helm; it needed to be a bit more grand...
...I really liked the helm and hanging fabric on the back on this figure (a dismounted Blue Box knight). So I decided a head swap would be in order. However, I was not thrilled with the big dragon crest, it not being consistent with the other heraldry on the figure (the green lion rampant on the shield and horse) and also because Team Black Lord has a dragon motif.  So I lopped off the dragon crest. Still, something needed to go up there on that (now) big flat part on top...
...and I thought that the crest on this figure was not too big and not too small, jusssst right for what I needed.  So I took the crest (just the top part) off of this figure...
...and put it on the aforementioned flat spot on top of the new head, which I then put on the aforementioned headless knight...

...and I upgraded the flimsy lance with a more robust one (painted green), added a bit of green to the horse's caparison (at the neck and the rump), painted the feathers on the crest and the scroll yellow and green...and Bob's yer uncle, here is the Team Green Notable knight. I rather like the way he came out. 

Meanwhile, work continues on other figures.  I'm waiting on the arrival of another small consignment of figures in order to complete my last team. Watch for another post as things move forward.

Excelsior!

Thursday, February 9, 2023

MAKING A LIST AND CHECKING IT THRICE


Three sets of lists done. The start of the next project.

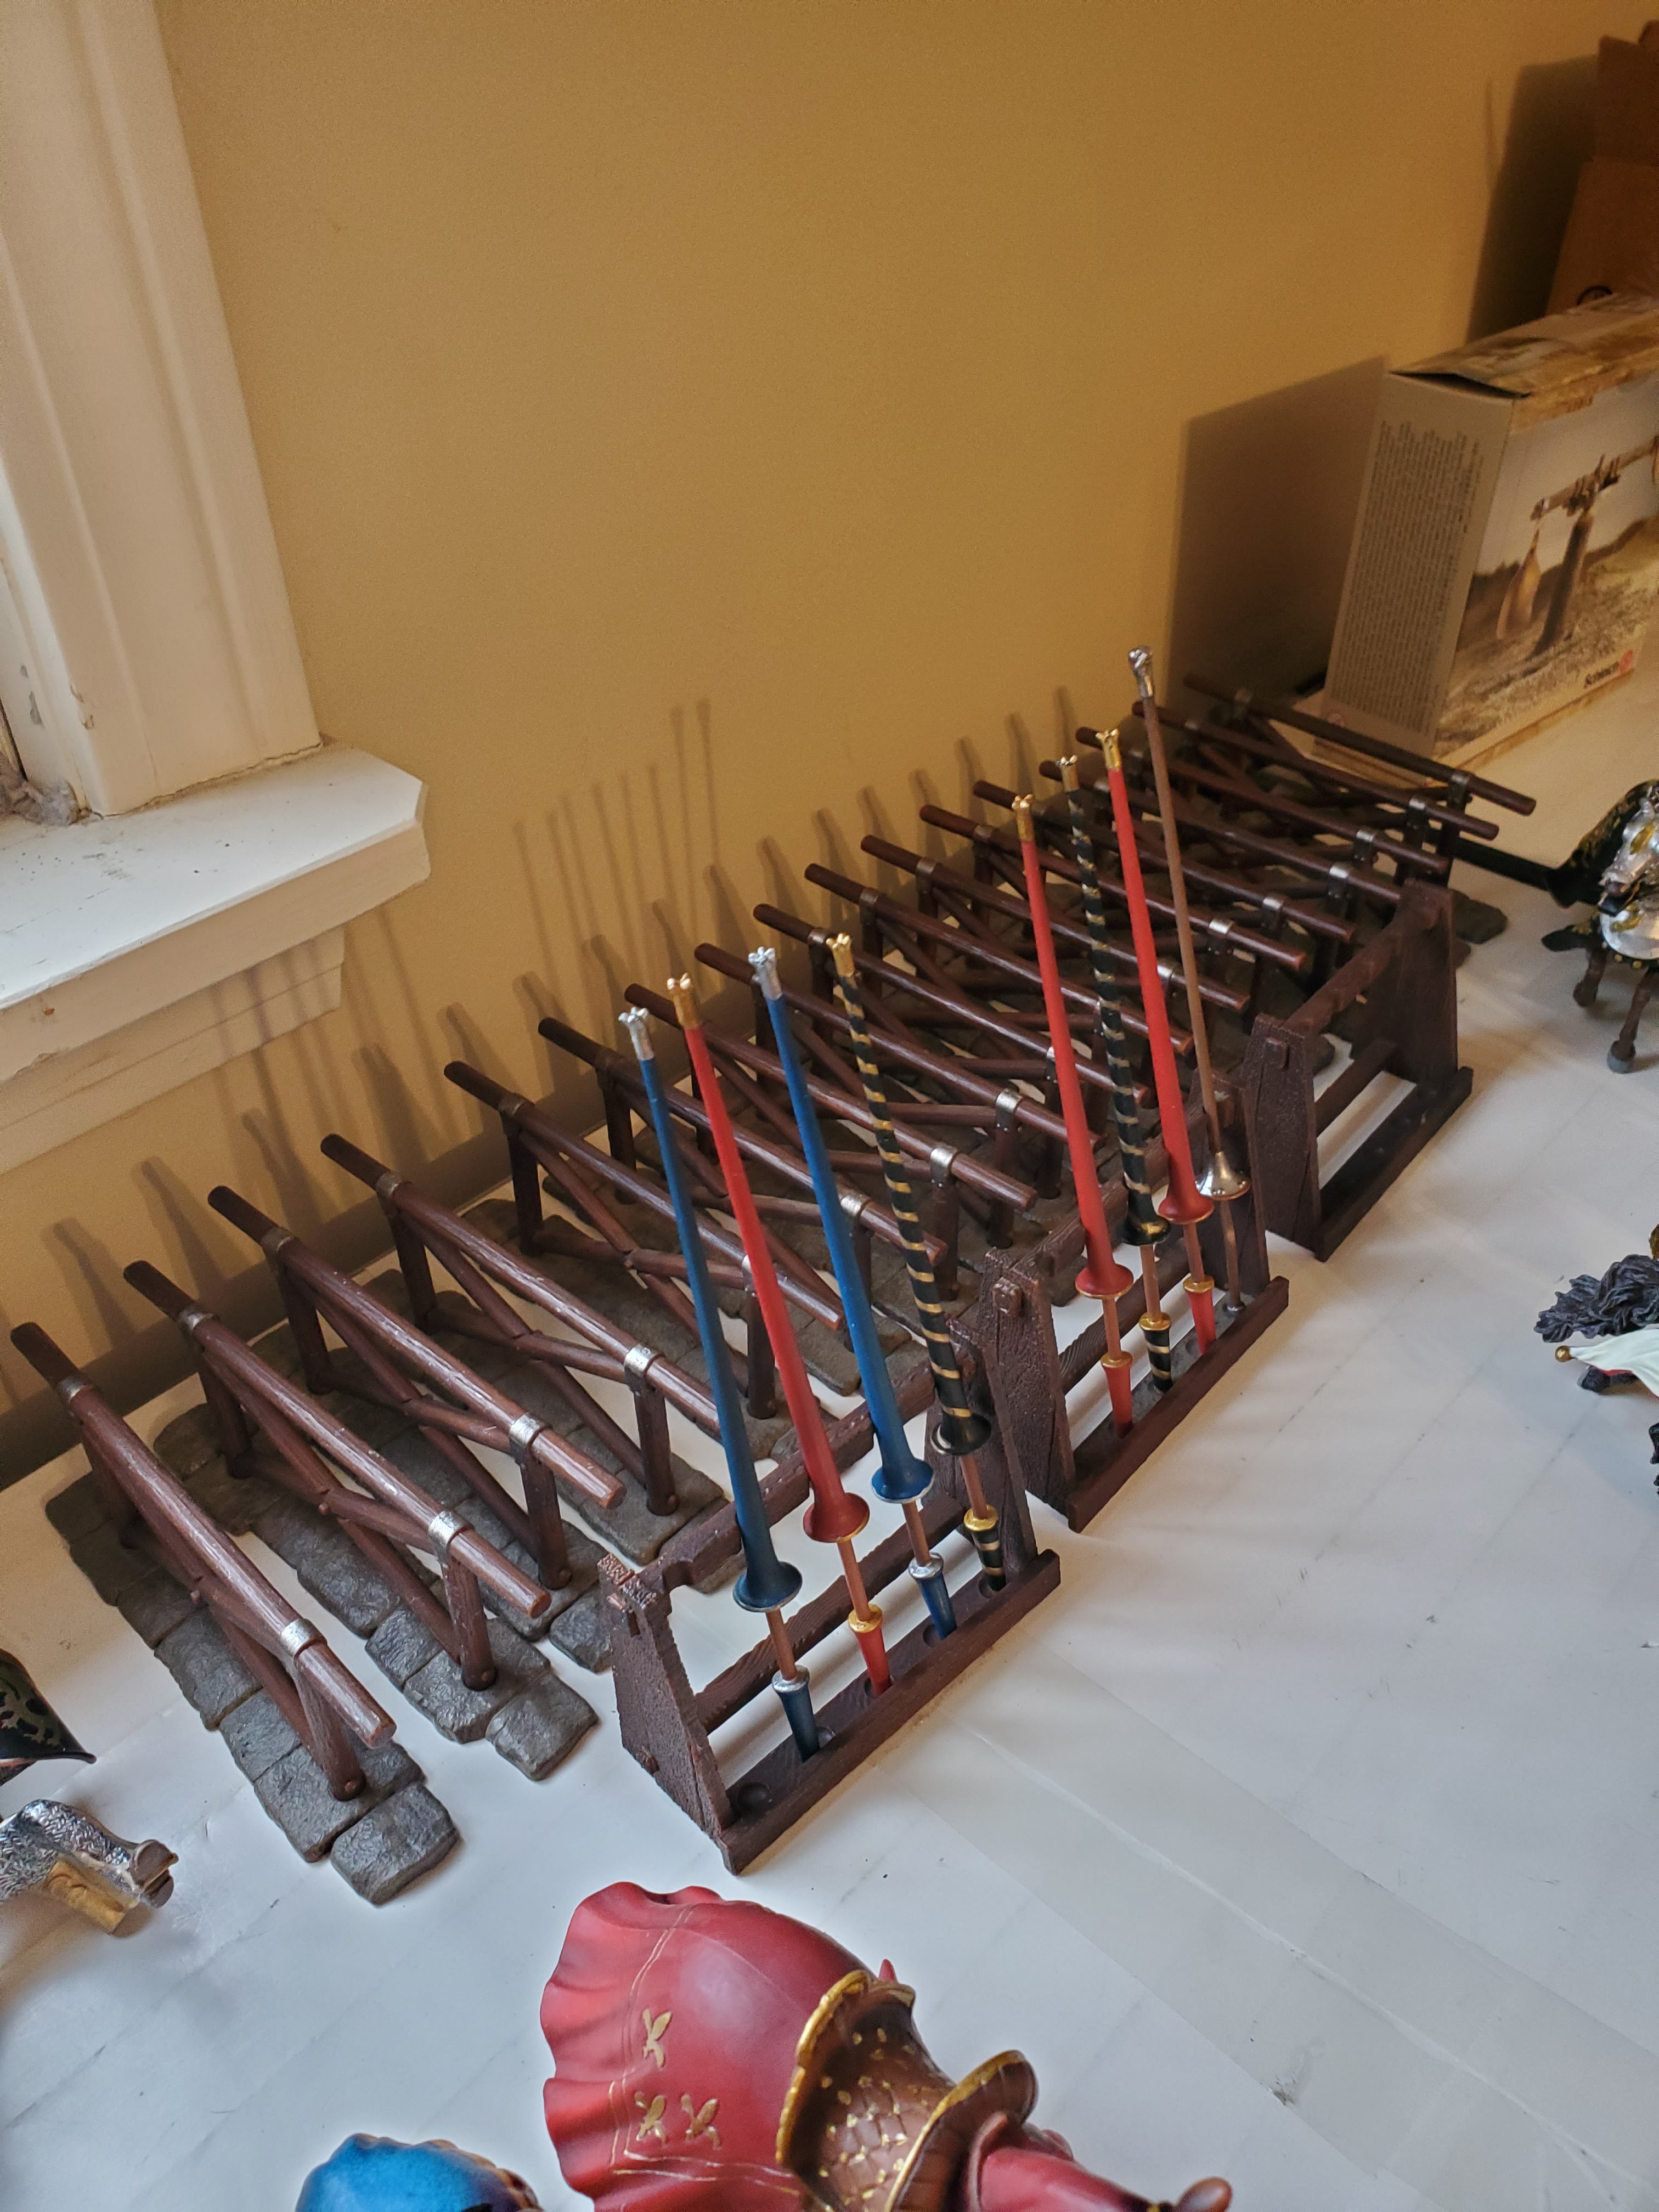
Having just reported on the completion of my Joust for the Fun of It rules, the hobby butterfly has alighted on the next phase of this project.  I originally created this game for 28mm figures.  Since I have all the figures and bits I need to run the game in 28mm, I  (of course) came up with the bright idea that I could also play it using the 1:20 scale Schleich toy knights. Of course, this means that in order to take my game on the road and run it for others, I would need at least 6 teams of 4 knights each, 24 in all. Towards these ends, I have been hitting ebay hard...
A snapshot capturing a swath of my recent ebay acquistions of big knights and big knight accessories.  I'll be doing lots of work configuring the knights into teams of four (how to mount them, modify them, etc, etc). Right now, I'm working with some friends who do 3D printing to come up with bits and bobs in support of that effort.  More to come on that in the future (still in development). In the meantime, I decided to tackle something that I could get done: the lists. 
I discovered among the Schleich World of Knight accessories these very nice list barriers (in this post, you may clix pix for BIG PIX as usual).
They're nice enough, but I figured if I'm going to "go big" with my figures, then the lists should add a bit more to the look.  And (above right) having added shields to my 28mm jousting lists... 
...I thought I'd do the same for my big ones. And this is how I did it.

First of all, I used a Heraldic Device clip art set that I've had for ages to produce two shields per list barrier (printed out, cut out, and mounted on a slim bit of plasticard). I also had a bunch of 1.5" x 1.5" wooden bases on hand. These I stained. I then used Gorilla Wood glue to paste the shields onto the wood. 
The Schliech barriers have lots of nice detail, to include this lug that protrudes out of one of the sides (there is a smaller one on the reverse). This presented a problem: how to mount the shields flush given this protrusion?
The problem proved to be the solution. I drilled a blind hole in the center of one side of each of the shield boards...
...and then I put them onto the barriers with the lugs fitting into the holes, which not only solved the problem but provided a flat-pack-like fitting of one thing into another to ensure that they were centered... 
...after the first side dried, I then flipped them over and put the shields on the reverse. It wasn't clear how flush they would sit on the rails, so I added two 1/4" woodworking cubes which were (happily) the same height as the rails (or just about) and put Gorilla Glue wood glue on them, and just to be sure, I also generously slathered the rails with J B Kwikweld (good for bonding wood to plastic, good for bonding just about anything!). This combination covered any variation in how the shields might lay. 

I configure each list with 5 barriers.  Each barrier has a single shield pattern that is repeated on both sides.  To be able to run 3 lists at a time, I fabricated 15 barriers, each with a different shield pattern. This way, no matter how I arrange them, there will be no repeat shield designs visible.  In this case, the outcome pretty much matched the concept: Big toy knights on big lists with big shields. So far, so good. 
 
Work now shifts to the much larger and more extended task of organizing, modifying, and configuring the knights. I just signed up to run this game at the Mayhem Convention (April 22), so I'll be sticking to this project to make sure I can see it through in time for the convention.  

Excelsior!

Related Posts Plugin for WordPress, Blogger...