Showing posts with label Napoleonics. Show all posts

Tuesday, April 26, 2022

NAPOLEONICS, MAXIMILLIAN ADVENTURERS, AND PIRATES: APRIL GAME NIGHT


April Game Night, with the Usual Suspects at play in three games.  Off to the left (partially out of picture) Napoleonics; in the center, Pirates; and off to the right in the corner, Maximillian Adventure.

Life has interrupted art recently--meaning that although there has been hobby activity the time and energy available for blogging about it has been more limited. Thus, there is a happy (albeit modest) backlog of things to post about, which I hope to get to in the near future (now that the garage has been cleared out and reorganized...). So, to begin, in this post, dear readers, I will give a light report on our club's April Game night.  We started up our regular monthly meetings in the fall--a welcome return to "normal"--although my own attendance at game nights until how has been light (for a variety of reasons), hence the lack of "game night" posts (for anyone who keeping track--not very likely).   

An administrative note: I have been concerned about the small font size of my blog posts, and am experimenting with a slightly larger font in this one.  I'm using the same font (Georgia), but in the "Medium" font size as opposed to "Normal" (which was the previous size--which appears quite small to my eye, despite it's name).  I am a bit concerned that the smaller font actually fits my wordy style better, and that the "medium" font size (used here) may cause a wall of text to crowd out images.  Any feedback would be appreciated on the reading experience (and whether it really matters: was the previous font size even an issue for anyone?).  And, as usual, In this post, as usual, you may clix pix for BIG PIX.

NAPOLEONICS
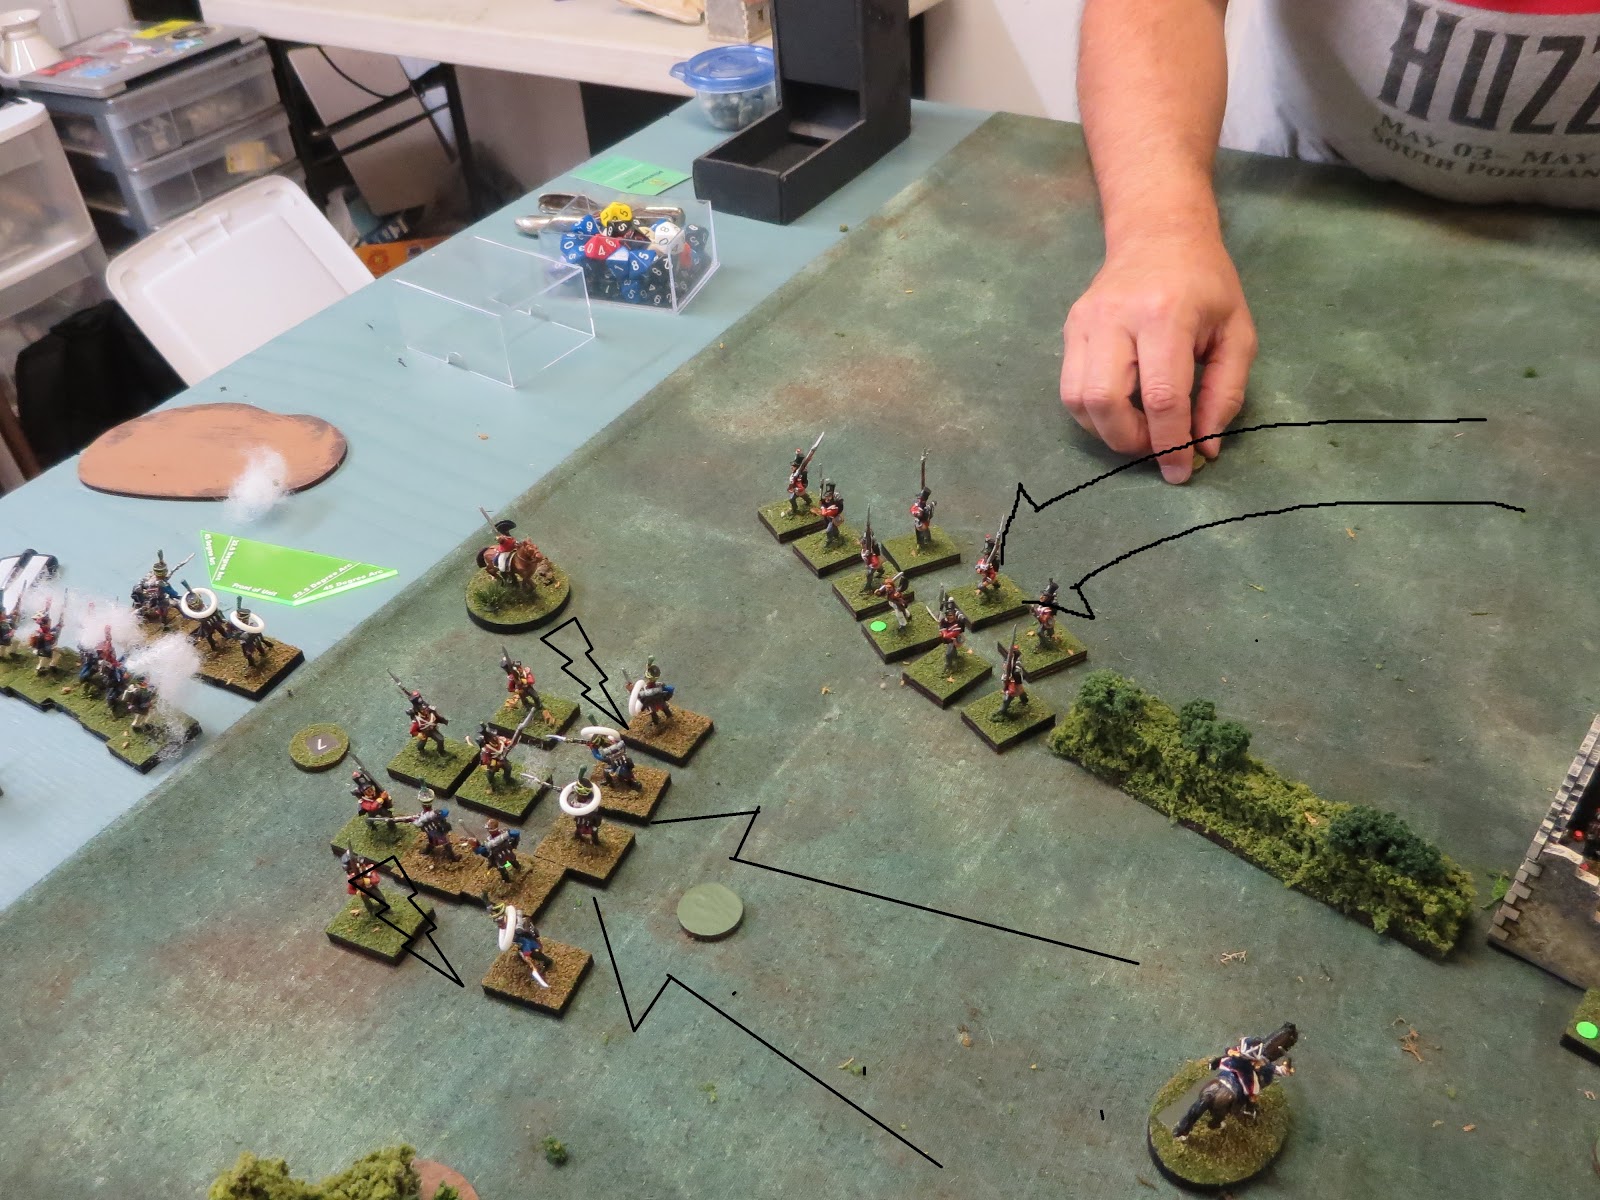
Charlie (standing) hosted a Peninsular French v Spanish Napoleonics game using his rules set, Napoleon's Rules of War
The game featured the usual display of Napoleonic goodness in 28mm.  I didn't pay much attention to what was going on other than to catch a few snaps, but I believe that the French prevailed--and Charlie's rules, which he has been developing and revising and are now in their second edition, have held up to yet another outing. 

MAXIMILLIAN ADVENTURE
Byron (baseball cap) brought out an old favorite, a The Sword and the Flame game set in the Maximillian Adventure using  figures that were passed down to him from Mark Stevens, a lifelong friend of his who had sadly passed away several years ago. Mark did not live in our area, but he would host these TSATF games at Historicon for club members, who have many fond memories of them..
The figures may be vintage (I believe mainly old Foundry), but the painting and presentation remain state of the art. This was quite a lively game, and reports are that the four players had quite a romp--like many TSATF games tend to turn out--and the game lived up to expectations.

PIRATES!
I participated in the third game: Pirates!  Mike B (not pictured) ran this one, which was set on a 12'x6' table. Many of us in the club have our own pirate ships and crews (from a previous game day), and we were able to use these in this game, which was one of the attractions (Mike also had ships and crews available for anyone who did not have one, but that wasn't the case--we were all self-sufficient buccaneers, arrrgh!). He had a simple set of sailing (and boarding!) rules that worked very well (once we got the hang of them).
"Red Sails in the Sunset..." I and my eager crew of likely lads set sail for adventure in my very own Pirate sloop, the Blanche Dubios sporting her distinctive red sails. Readers of a certain vintage may find the illustration on the (appropriately) split-tailed banner familiar.  Yes, it's a man's life at sea..."Men, men, men, a ship full of men".
(Left) Dr Dick reaches for trouble while the pirate-bearded Phil looks on. (Right) Canny Pirate Phil's vessel lurking in the corner early in the game.
It was an "every pirate for 'imself" sort of game (what else?), with a merchant ship in our midst to fight over for a prize.
(Left) Dr Dick delivers a cowardly stern rake to the courageous Blanche Dubios. (Right) No matter: the Blanche Dubios and her fine crew boldly board the merchant ship right from under the noses the lesser pirates...
...who would then turn all their attention on the Meanderer and his prize crew aboard the merchantman to try and keep her from making port and cashing in. But in vain.  The crew got wiped out by a final blast of grape, leaving the captain as the sole survivor just as it pulled in to port (quite a finish!).  This was the best of all possible results, of course, for a pirate Cap'n; I'll miss the lads, but then again, there'll be no need to split the booty!  
And speaking of booty, at the end of the evening, I had hauled in the most doubloons and so came away "Top Pirate" (arrrgh!). 

Excelsior!

Sunday, November 15, 2020

THE BOTTLE AND THE BATTLEFIELD: KOLIN, 1757

Schlacht bei Kolin, HGM Poosch, Wikimedia Commons

In this post, dear readers, we take another turn into my e-books for antiquarians in order to share a colorful, if little known, anecdote of the Battle of Kolin, June 1757--Frederick the Great's first defeat.  Although the course of this battle is worthy of study, I won't reprise it here.  You may find several excellent accounts on the Battlefield Anomalies web page and the Project Seven Years War page (among others).   This posting was generated by my perusal of the below book on cavalry, written in the immediate aftermath of the Napoleonic Wars by Count Von Bismarck (not the Prussian Iron Chancellor of the later century) who was an officer who reformed the Wurtemburg Cavalry.  It was translated into English by an English cavalry officer who adds his own notes and commentary. Anecdotes aside, it is well worth reading for information on the role and use of cavalry in the Napoleonic era and the lessons learned, covering everything from the conceptual and operational to the organizational and sub tactical. I am fortunate enough to have a copy of my own, but it is openly available in digital form on the web (see information below the title page images below). As usual, in this post you may clix on pix for BIG PIX (and will probably need to do so to read the passages):

 
Lectures on the Tactics of Cavalry, 1827, available on the Internet Archive

Like many of the military treatises of its day, this text has much "technical" information on the organization, configuration, and evolutions cavalry, but it is also generously sprinkled with historical anecdotes in support of concepts and principles. This particular tome is most rich in these, with bits pulled from antiquity right up through the (then) latest wars.  So not only is it a rich resource on Napoleonic cavalry, but it is also a dashing good read on military history and attitudes. Some of these anecdotes are well known, and some not so much--which brings me to this post, which relates an entertaining anecdote from the Battle of Kolin.  The battle happened during the Seven Years War between the Austrians and Prussians, and raged all day, with the Austrians under Daun holding off the assaulting Prussians. This was the battle where Frederick is famously said to have grabbed a color to lead a renewed charge ("Dogs, do you want to live forever!") only to find that the was heading up the hill alone.  Later in the day there were several Austrian cavalry charges that decisively turned back the Prussians. Accounts vary about these, which is an interesting topic in itself. Focusing on the book's anecdote, there was a three-regiment Saxon cavalry brigade on the Austrian right wing whose role is sometimes mentioned, sometimes mentioned only in passing, and sometimes not mentioned at all.  Additionally, the sources are contradictory on the crisis of the battle, some accounts mention that Daun had sent an order to withdraw late in the battle (others don't mention this order at all, interestingly enough).  Obviously, the more "Austrian" the narrative, the less is made of any decision to abandon the field or the role of the Saxons.  In the end, it wots not: the Austrian Army did not withdraw.  Instead the right wing cavalry charged and broke the Prussian last effort late in the day, driving them from the field.  This anecdote focuses on the moment that this withdrawal order arrived at the Saxon cavalry brigade, and the response of its commander, Saxon Lt Colonel Benkendorf...

The below is a footnote Found on pages 79 and 80 of the text as an illustration of the phrase, "The winning or losing of a battle depends often on some small, unimportant accident, not taken into the calculation of the General" 

(Clix pix for Big Pix to read)

 If it didn't happen this way, it should have, is all I have to say.

 The note above has it's own footnote that is worth including:


Excelsior!

Sunday, September 6, 2020

NAPOLEONIC SKIRMISH SOMEWHERE IN THE PENINSULA

Greetings, fellow shut ins! (at least mainly "shut in" when it comes to gaming).  In this post, I (belatedly) follow up on the promise of my last: a battle report of an actual face to face game. Several new acquisitions--most notably a striking unit of Nassau Grenadiers--to my friend Mark's collection (he of Mark D's Wargaming Blog) provided the inspiration for this game. I provided the French and Mark the British/Spanish. This was another game using my Brother Against Brother Napoleonic variant (so much of a variant that I sometimes refer to it as "Not Brother Against Brother"--but that's a brother of a different color).  Moving on, in the below report you may, as usual, clix pix for BIG PIX (and probably will need to do so if you want to see the text in the images). 

The scenario: The British had three larger companies (three platoons each) and the French  four companies (of two of platoons each, except for the 1st). The British started with one company (the 1st: Spanish) deployed anywhere north of the river up and to 24" in, and one company of their choice south of the river.  The last British company would dice to arrive on the road.  The French could start one company (of their choice) on the North table edge (figs would march in measured from the edge), with one French company arriving each turn thereafter (order up to the French) down the road.  After turn 3, the side that ended a turn with the only unit within 12" radius of the road junction and the town center would gain 1 point (each zone controlled). Click for a full order of battle and scenario information. The stage was set for a scrum!

Mark chose to deploy his 3rd Company on the table (two British line platoons and the Nassau Grenadiers) on the south side of the river.  He deployed the elements of his 1st Company (Spanish Grenadiers and two units of Guerillas) forward, along with the his Army command stand, which would manage the fighting at the crossroads.
The action begins: Mark detached one of the British Line platoons from the 3rd Company to work in support of his right. The Spanish Grenadiers took up residence in the town (from which they would not be dislodged) and the guerillas moved forward towards the north of the crossroads and to block the French entry.  Meanwhile, I brought on the 1st French Company (the largest), consisting of two legere peletons and one carabinier peleton plus the French Foot artillery.  On the extreme left, I got a legere peleton into the woods to maintain a presence in the 12" town zone.  Details of this early stage of the battle follow...
The lead French Legere peleton making for the key woods by the crossroads...

...but the pesky Guerillas get there first!
...the Tommys and Dutchers of the British 3rd Company come forward, while the the Royal Horse Artillery section makes for the hill to the British left. In the distance, the next French company can be seen getting ready to arrive...
Lieutenant Pierre Regret--soon to be the late-lamented--inspires his elite Carabinier peleton...
...Meanwhile, out on the British Right/French Left, it is shaping up to be a long day for the French. Mark would make maximum use of the cover and superior British musketry to shred the French on this wing. In order to prevent Mark from getting points, I would have to cycle units into the woods (within 12" of the town) who would then wither under the musketry coming from the town. 
Mid Game: Sniping back and forth continues between the French legere and the guerillas in the woods. The French 3rd Company (a line infantry and voltiguer) have arrived and are engaged with the guerillas in the open on the right. The 10th Chassuer detachment came in with them and has trotted up the road. Meanwhile, the French foot battery has pulled back after getting worse than it gave vs the Spanish grenadiers in the town. The legere peleton on the left is hanging on in the woods vs the town as it gets shot at from the town.  Lieut Regret and the Carabiniers have collided with the British Line and Nassau Grenadiers at the crossroads.  The British 2nd Company (KGL lights, British Lights, and detachment of Brunswick Hussars) is lining up to arrive. Some details of this phase...
...Lieut Regret falls in melee to Sgt John Bull, spawning a new saying, "Never bring a bayonet to a spontoon fight"...
Under the watchful eye of the Army Command Stand, the Nassau Grenadiers finish off the now led-from-the-ranks French Carabiniers...
...Meahwhile, Lieut Pate, leading the Voltiguer peleton of the newly arrived French 3rd Company, gets cut down in melee with the Spanish Guerillas! (losing unit leaders in melee would be a trend for the French...) Eventually, this unit of Guerillas was reduced to a single figure, which was shot down, firing squad-like, rather than by melee to finish them off (very Guernica)!
Late Game: The British have detached the British Light Infantry platoon of the late arriving 2nd Company to the right in order to take over the zone around the town.  The last French company, Impierial Guard, with one peleton of Old Guard Chasseurs and one of  Young Guard, has arrived and become heavily involved, the latter managing to take out the RHA guns on the British left.  The KGL lights have come up just in time and taken up position in the woods at the crossroads, handily fending off the French Old Guard Chasseuers. The newly arrived French 2nd Company (with two line peletons) has been sent into the meatgrinder on the French Left.  The pesky Guerillas have jumped out of the woods to harass the redeployed French artillery (thankfully, without a company commander, the Guerillas were not able to order a charge!). The Brunswick Hussars have been reduced to one figure and are out of command, while the French 10th Chasseur detachment is no more (so much for the cavalry). A few more details on the end game...
...The British lights take the now newly renamed woods on the British right, and the battered French 2nd Company is pulled back, leaving the British to gather points for control of the zone. In the distance, late game action continues elsewhere. A fateful event card has brought the Nassau Grenadiers some replacements, which have helped to stabilize the center...
...yet there were still high hopes that the Old Guard Chassuers would advance and sweep the KGL lights out of the woods and dominate the center, tipping the scales in a game winning charge! (Shades of late in the day at Waterloo). Not so much in practice, though: not only did they not take the woods, but the KGL wiped them out to the last bearskin, whilst not losing a single figure themselves (the debut game curse came for my newly fielded Old Guard Chassuers: I shoulda' knowed better!).
...Meanwhile, out on the extreme end of the line, the Young Guard peleton has been reduced to half strength but still has its lieutenant (take what you can get). From its position, it looks on as the Old Guard disappears into the woods vs the KGL, never to be seen again. On the bright side, such losses among the Old Guard will mean more chance for promotion among the survivors in the Young Guard.  Trotting up the hill, the one remaining Brunswick Hussar, although out of command, could still shoot with one dice (at reduced range and with a negative modifier for being mounted), and so he did, predictably still picking off a Young Guardsman!  Oh, the humanity!
Many thanks to my gracious host, Mark.

Victory this day was to Mark and the British, and well deserved! It was fine day of face to face playing with toy soldiers, one that has been a long time coming.  For those who might be familiar with Brother Against Brother, my variant uses a dice system for morale and special events rather than the cards. If you're interested, you may download the player reference sheet, which includes enough information to explain how this works (I think), the event list, and a sample unit rating list.  In this game report, you might notice numbered disks on the table. These are my Universal Activation Markers.
Excelsior!

POST SCRIPT: On the New Blogger Platform.  In my previous post, I expressed my less than enthusiastic assessment of the new blogger platform.  However, I did find one thing to like: the font management system.  I take that back. With this post, blogger reverted to its old trick of displaying some default font size and type other than the one I selected (and that I see when composing posts).  Sigh.

Saturday, August 29, 2020

GAME REPORT COMING

Napoleonic Action in the Peninsula

Well, it's been nearly a month since I've posted.  Just wanted to get a quick one in to show that I'm still here for the few followers who might be interested.  Returned to work amidst the pandemic this month, which has been both very challenging as well as consuming.  I've done some hobby tinkering, but haven't done much, and had very little energy left for blogging.  However, there has been a major development: I actually played a face to face game at my friend Mark's (of Mark D's Wargaming Blog), who graciously invited me over to his place. This was my first non virtual, real toy soldier game since February, something of a landmark--and even better since I took the day off from work for it.  It was both a return to the familiar but also a "different" experience playing again after so long, and still in the midst of this pandemic (although we were both safe).  We christened some of his new figures in a Napoleonic Skirmish set in the Peninsula--something we had played at his place in August two years previously, coincidentally (I guess this means that August is Napoleonic skirmish month for us).  Things remain busy at work, and I've got a spot of carpal tunnel going on that is hampering my keyboarding, but I hope to provide a game report in the next week.
    I will add a post-script here.  This is my first post using the new interface, and I'm glad that it is a brief one.  Change is always an adjustment, but I'm not taking a liking to the new dashboard and the stuff it brings. I don't understand the penchant for change for it's own sake in the computer/IT world.  When you're always screwing with a learning curve, it doesn't matter what the bells and whistles are--particularly if you don't need them.   My career(s) in three different sectors over my lifetime have taught me that being totally fluent in a less sophisticated platform is much more efficient--and produces a much better product--than operating in a fog in something new and shiny (harumph!).
 
POST POST SCRIPT:  After putting up this post, I noticed that my blog is not showing among the list of blogs with new posts on other blogs.  I haven't noticed that any of the blogs I'm following are not updating on my blog (ie, they seem to be updating fine--the thumbnail issue is separate).  So I'm wondering if this is a bug that has something to do with the new interface (some setting that changed without my knowing it: I haven't changed any of my settings myself)--and I'm also wondering if anyone else has noticed this happening with other blogs?  I'd appreciate it especially if any of the bloggists out there who may have my blog among their blog lists are seeing what I'm seeing (or should I say, not seeing what I'm seeing--ie, that this blog had a new post).  Thanks!
 
   Excelsior!

Sunday, August 26, 2018

NAPOLEONIC SKIRMISH IN THE PENINSULA: A (NOT) BROTHER AGAINST BROTHER BATREP

Mark D's new Spanish guerillas, on their still in-progress bases, make their (very successful) debut.

It's been awhile since I've posted about actual game activity. Thus, I am happy to finally report, albeit belatedly, about an excellent gaming visit I had with my friend Mark D (who also has a report on this game on his blog). Mark has been exploring skirmish level rules for his expanding Peninsular 28mm collection.   Having not settled on anything yet, he invited me up to his place to give my Brother Against Brother Napoleonic variant a try.  Regarding that system,  I'll make some contextual references to some of the rules in this report, but will defer a more direct discussion  until the end. Suffice it to say that I nicknamed it "Not Brother Against Brother" to tip players familiar with BaB to not assume too much when playing it.  It retains the bones of BaB, but departs in details.  In this post, as usual, you may clix pix for Big Pix...
Mark took the part of the British/Spanish and I the French. For the initial set-on, we placed the unit leaders and command figures. Once activated, we then bring the unit figures on. Above Left: the French initial set on, with the HQ and Baseline noted. The HQ is one of my additions to the BaB standard rules. The HQ can be placed anywhere within 12" of the friendly table edge--and is also limited to this zone. It moves at the end of every turn (may be relocated anywhere within this zone). It can provide company command to a "squad" within 6" and has some functions related to random events and leader replacements.  Each side has also designated a "baseline"--in this game marked by a wagon with the baseline extending 24" to either side. If the baseline is threatened (defined as an enemy unit coming within 12" with nothing in its way directly to the baseline), then units of the threatened side would be obliged to either hold in place or move closer to their baseline (if moved) until the gap had been covered or the threat removed.  Above Right: Mark's allied set on: a fairly balanced approach for both. 
The view from the French side after the first turn.  The discs are my universal activation markers  (in case anyone is wondering).
Overview of the action at the conclusion of the first turn--just before the "stuff" hit the fan. 

 INITIAL ACTION ON THE LEFT...
 My Legere cozy up to the hedge and let loose a withering, albeit futile fusilade (signifying nothing). The British Guards sidestep out of the fire lane. The French grenadiers, taking a cue, also scuttle behind cover. Meanwhile, the British lights have yet to activate, and seem to be up to something (what is Mark up to, we wonders?)...
...with a high movement die roll, Mark swings the British Lights out on to the flank, with the company officer along to allow them to initiate melee. A crafty move, indeed: who will activate first next turn? The British Lights or the Legere?

MEANWHILE, ON THE RIGHT...
My dragoons get the first activation and a golden opportunity to...
...send a fusilade into the Spanish guerrillas caught in the open...
...that was the theory, anyway.
Not being one to let an opportunity pass, Mark then sends Guerrilla Band #2 to melee my dragoons (of course, the guerrillas pass their moral check).

AND IN THE CENTER...
The French and British guns indulge in counterbattery fire, the British gunners scoring a hit and coming out unscathed. The French and Polish line infantry fire with about as much effect as the French dragoons. The Poles receive the attention of the Portuguese--and are much reduced as a result.
It was at about this time that I took the entirely rational step of purging dice that had disappointed me.
.
OVERVIEW...
The action thus far: in the melee, Spanish Guerrilla Band #2 thumped the French Dragoons (note only 4 figures left), who will go on to fail their morale and fall back in their next activation.  Guerrilla Band #1, after dodging the French fire, is snugly ensconced in the building, and the British Lights are poised at the edge of the table on the extreme left flank. Both sides have secure positions, though, with neither baseline in danger.

BACK ON THE LEFT...
Above Left: my Legere get the first activation and launch a charge into the British lights (note that sometimes we use kill rings to show figures with empty muskets). The British Guards activate next and swing around in position to support the British lights and threaten the Legere. Above Right: I send my French grenadiers into melee with the British Guards to even things up. When the British Lights activate, the subsequent melee round doesn't go well for the French Legere (as witnessed by the figure count), but the Grenadiers come out ahead in the initial melee with the British Guards (sparing a few dice a trip to the gulag...for now)...

Above Left: in the ensuing action, the British Guards manage to back off and deliver a spirited volley into the Grenadiers. Above Right: the British Lights manage to dispatch the French Legere. This triumph is short-lived, however, as the French guns fortuitously now have a clear line of fire, sending the British Lights to join the French Legere in Ragnarok.
A random event "Gendarmes Return Stragglers" then came up (which allows each side to return some figures). Mark shored up his Guards and I shored up the French Grenadiers, which returned this flank to stasis. These were the only viable units in the area and both of us felt the tension to hold the line as opposed to just throwing units around--the effect of the baseline rule infuses the tension of maintaining a viable position.

AND ON THE RIGHT... 
The chastised remnant of my French dragoons return to the fray, taking a page from the guerrilla book and skulking in the woods. They unleash another near point blank fusilade in the general direction Guerilla Band #2, with the same results...

...and consequences.

AND IN THE CENTER...
Guerrilla Band #2, now known as the "Men of Iron" continue to defy the odds. Meanwhile, Guerrilla Band #1 has settled-in for the duration. 

THE SITUATION AT END...
The "Men of Iron" pull back to secure the woods on the British left. At this point, things had returned to stasis. With both sides stretched to cover the line, any advance  would be a risky affair.  Thus we called it a draw.
 It was just as well.  I was running out of dice, anyway. 


 THANKS!

 Thanks to Mark and his lovely wife, Nancy, for hosting me to a Friday/Saturday interlude of gaming at their place.
 
 NOTES ON THE RULES
Here are a few notes about my (Not) Brother Against Brother Variant. One probably would need an understanding of the rules to make sense of the below materials.
I replaced the cards with die rolls for morale checks and random events (roll for random events when a die roll of "1" or "0" comes up on a morale check).  I rate each unit for movement, morale, fire, and melee--but these ratings are independent of one another, allowing greater granularity for designing units. This allows you to have Spanish guerrillas, for instance, rated green for morale yet melee as "shock." The combat, movement, and morale effects are modified, as evident in the Reference Sheet. One thing to note is that unlike muskets, rifles have a "rate of fire": they may only fire up to  1/2 (max) per turn, but you don't keep track of loading/empty. Rifles also have extended range, but not an inherent +1.  The riflemen, however, could be rated as "skilled" shooters (and usually are), rendering the +1. You can access these files as well as some markers and other resources in this folder. Eventually, I'll gather together some coherent notes and post my BaB Napoleonic variant in a content page on this blog (there's no shortage of hobby activity ahead!).

In the meantime, dear readers, thank you for your indulgence on this rather overlong report.

Excelsior!
Related Posts Plugin for WordPress, Blogger...