Polish Haiduks and Dragoons at the head of the column as the convoy emerges from the marsh and into the open "no man's land" to the bridge.
Last week Friday, I hosted a "stay behind" game at my place as a compensation for those of us who had not made the trip to the Historicon convention. I had planned on four players, but one of the lads found out that he was a close contact with COVID and so decided to stay home and isolate until he knew he was safe to be around--he was very apologetic about the last minute notice, but I've accepted such things as the "new normal" we're living in. In order to make up the foursome, I took up one of the commands and both played and facilitated the game. I had a fine time, but the involvement was not particularly conducive to recording the game for a blog report. Nevertheless, I think there will be enough in this post to provide a bit of eye candy, a coherent narrative of the course of the game, and complete details of the scenario should anyone want to give it a try themselves. On to the stuff: as usual, you may clix pix for BIG PIX in this report.
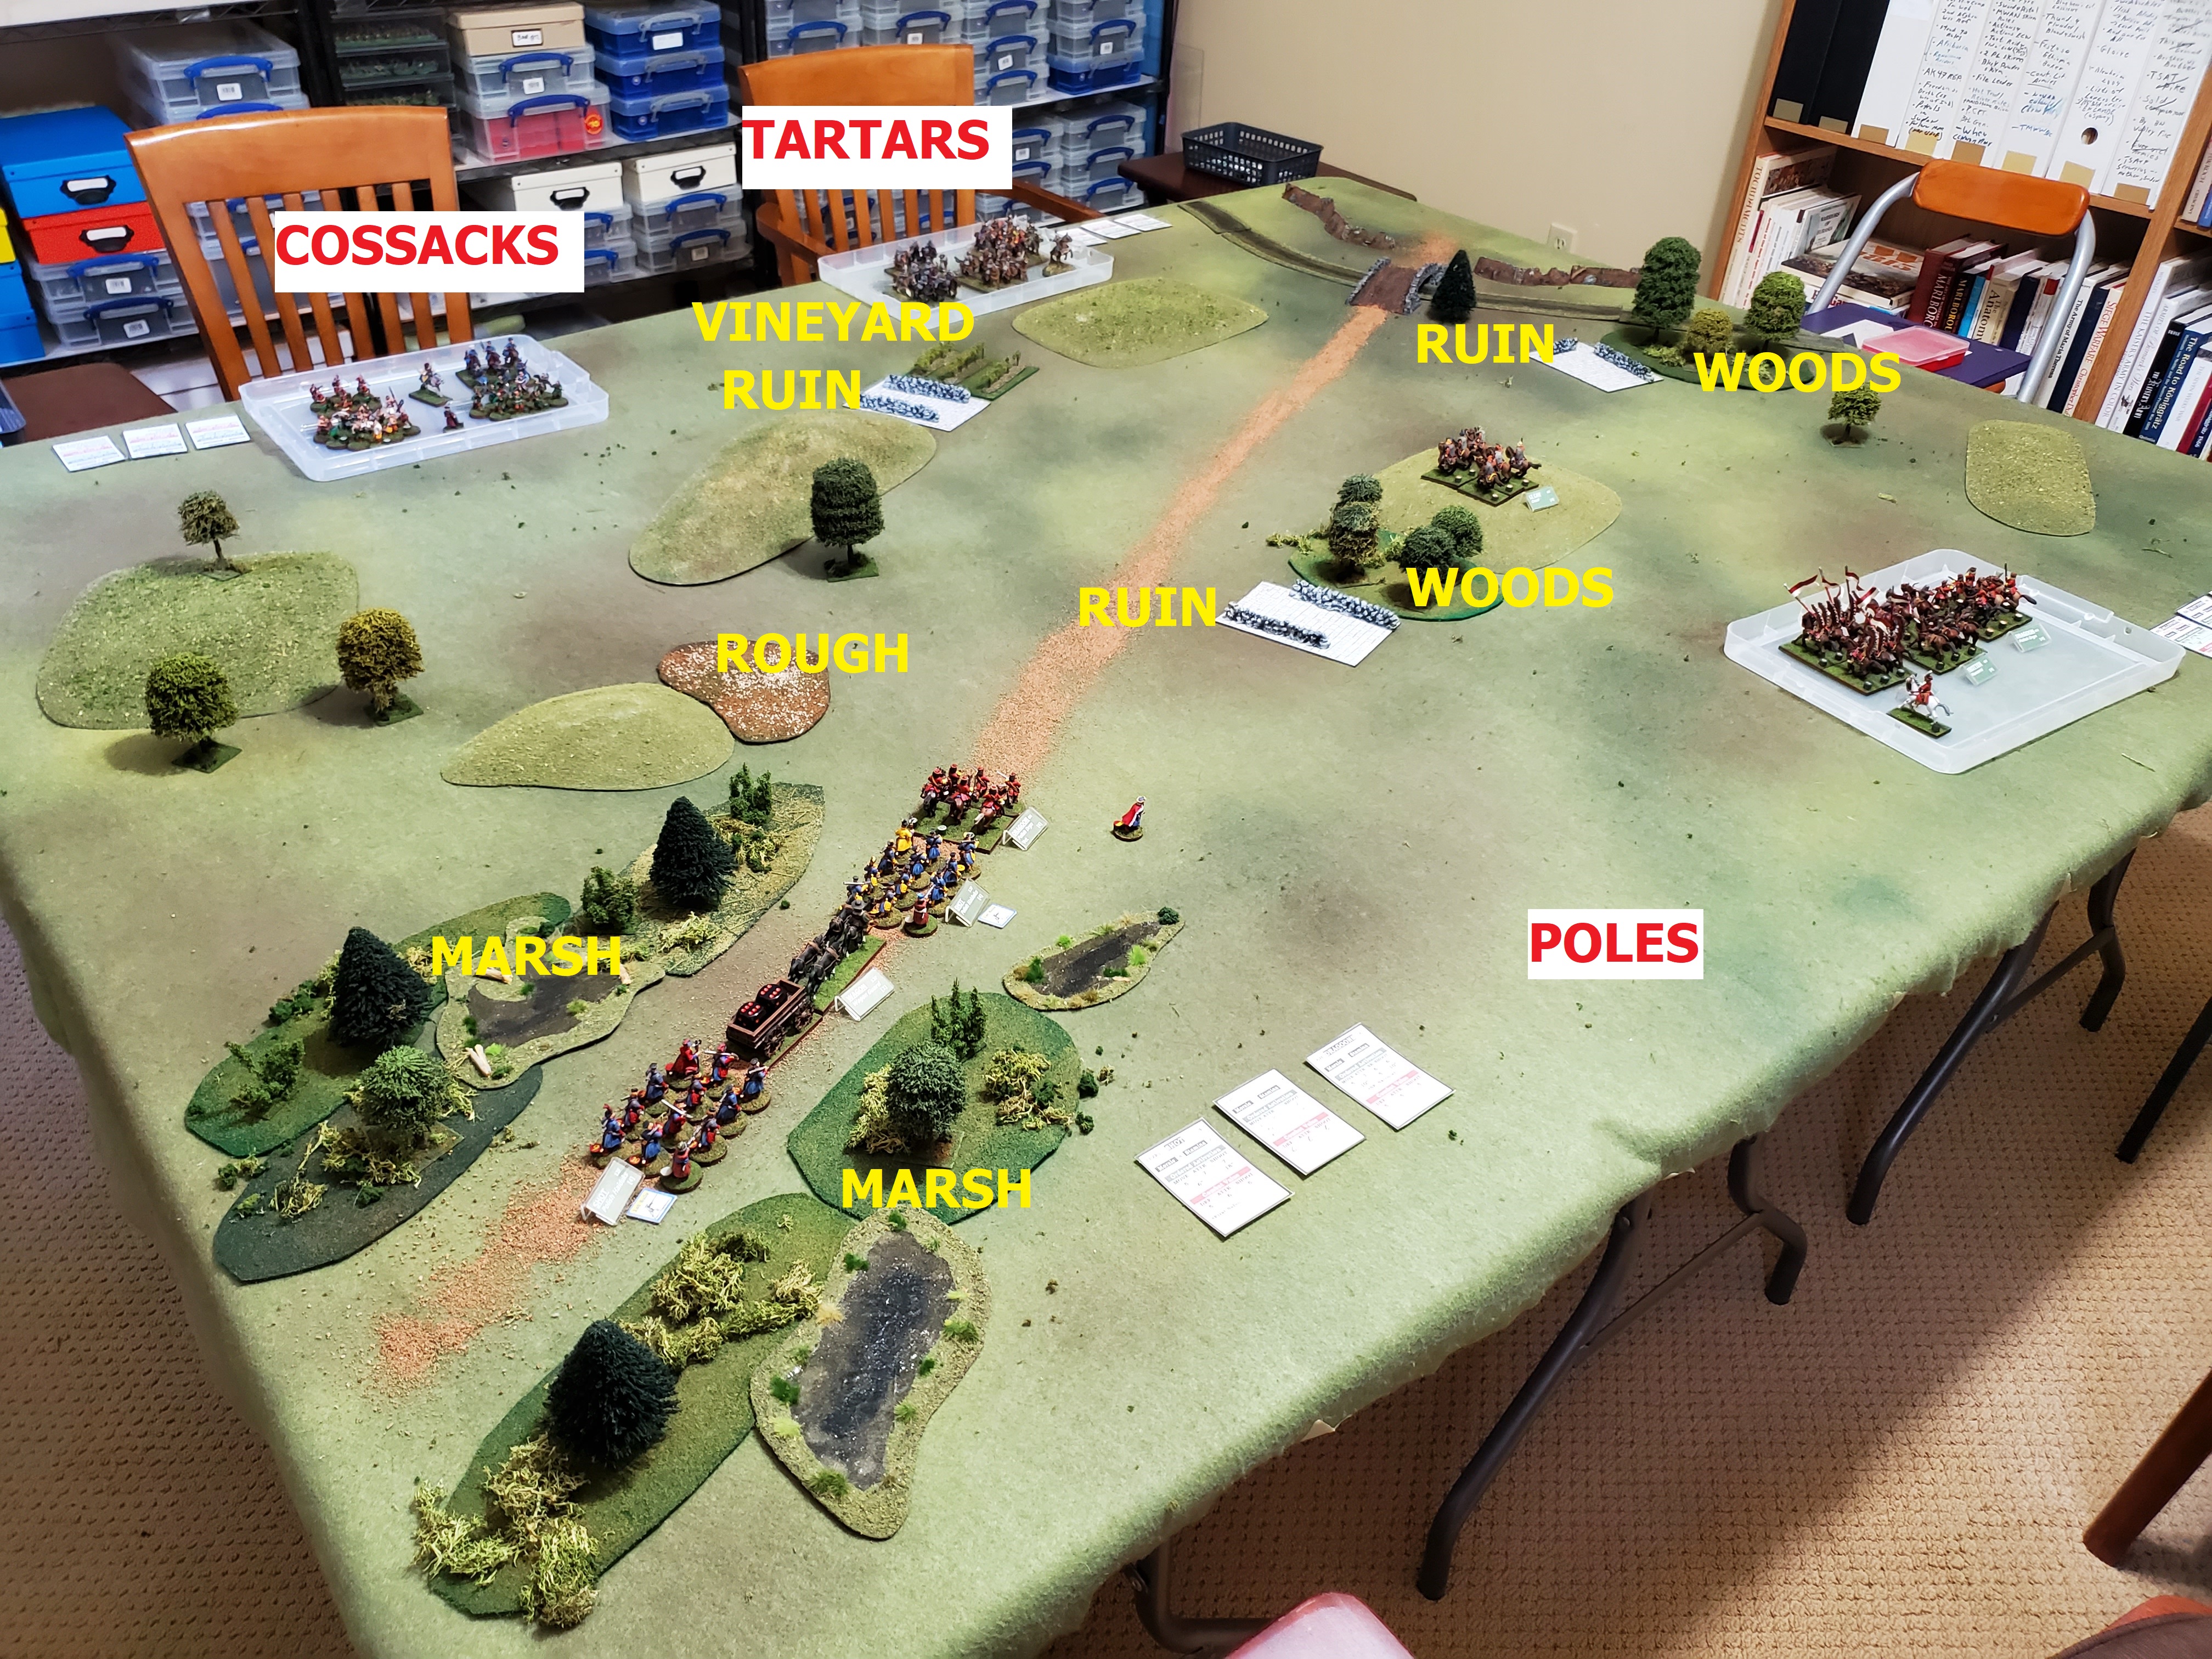
The situation and terrain: this game is set in the "Eastern Renaissance" (sometime in the 17th Century, somewhere in modern day Poland). The area is generally open, with minor hills, scattered woods, and the remains of a few structures (which serve as "cover" for combat, rough for movement, but not obscuring terrain). There is a road emerging from a major marsh (bottom left) traversing an open area of "no man's land" before reaching a bridge over an unpassable river. The Cossacks and Tartars are in league coming from the East (the top of the table in the above picture), opposed by the Poles coming from the West (bottom of the table). The object of the game is for the Poles to get the wagon across the open zone......to the bridge. The right side of the river is out of bounds, representing territory controlled by a Polish Crown hetman who is aligned with neither of the factions but whose territory would ensure safe passage of the convoy once it crossed the river. As an interesting wrinkle, I created a custom unit to represent the wagon and wagon guard. The dice in the wagon (pictured above) represent the figure count (it starts with 12). To make things more interesting, the wagon would only need to get as close to the bridge (in inches) as there were figures remaining (pips left on the dice). So if it makes it across the table unscathed, it would only need to get within 12" of the bridge for the Poles to win. If it takes losses, then it would need to get closer. Even though it has 12 figures (or the equivalent), I counted it as "Horse" given how it would pay for terrain (in PL, the standard "Horse" unit is 6 figs). Here are the stats for the wagon guard (if anyone is curious or would like to replicate it): One of the key points for the wagon/wagon guard is that it does not check morale or waver. It just takes losses (and if meleed and loses, it would retreat but not waver). One reason for this is to keep the mechanism that drives the game, ie, the wagon, from disappearing from the table due to a freak morale failure (in PL, if the modified result of a morale roll is 0 or less, the unit goes "poof"). That plus it just makes for better game play in general for it to have to be physically taken or reduced rather than sniped at from a distance hoping for a lucky die roll to end the game--although it could still take losses from shooting.
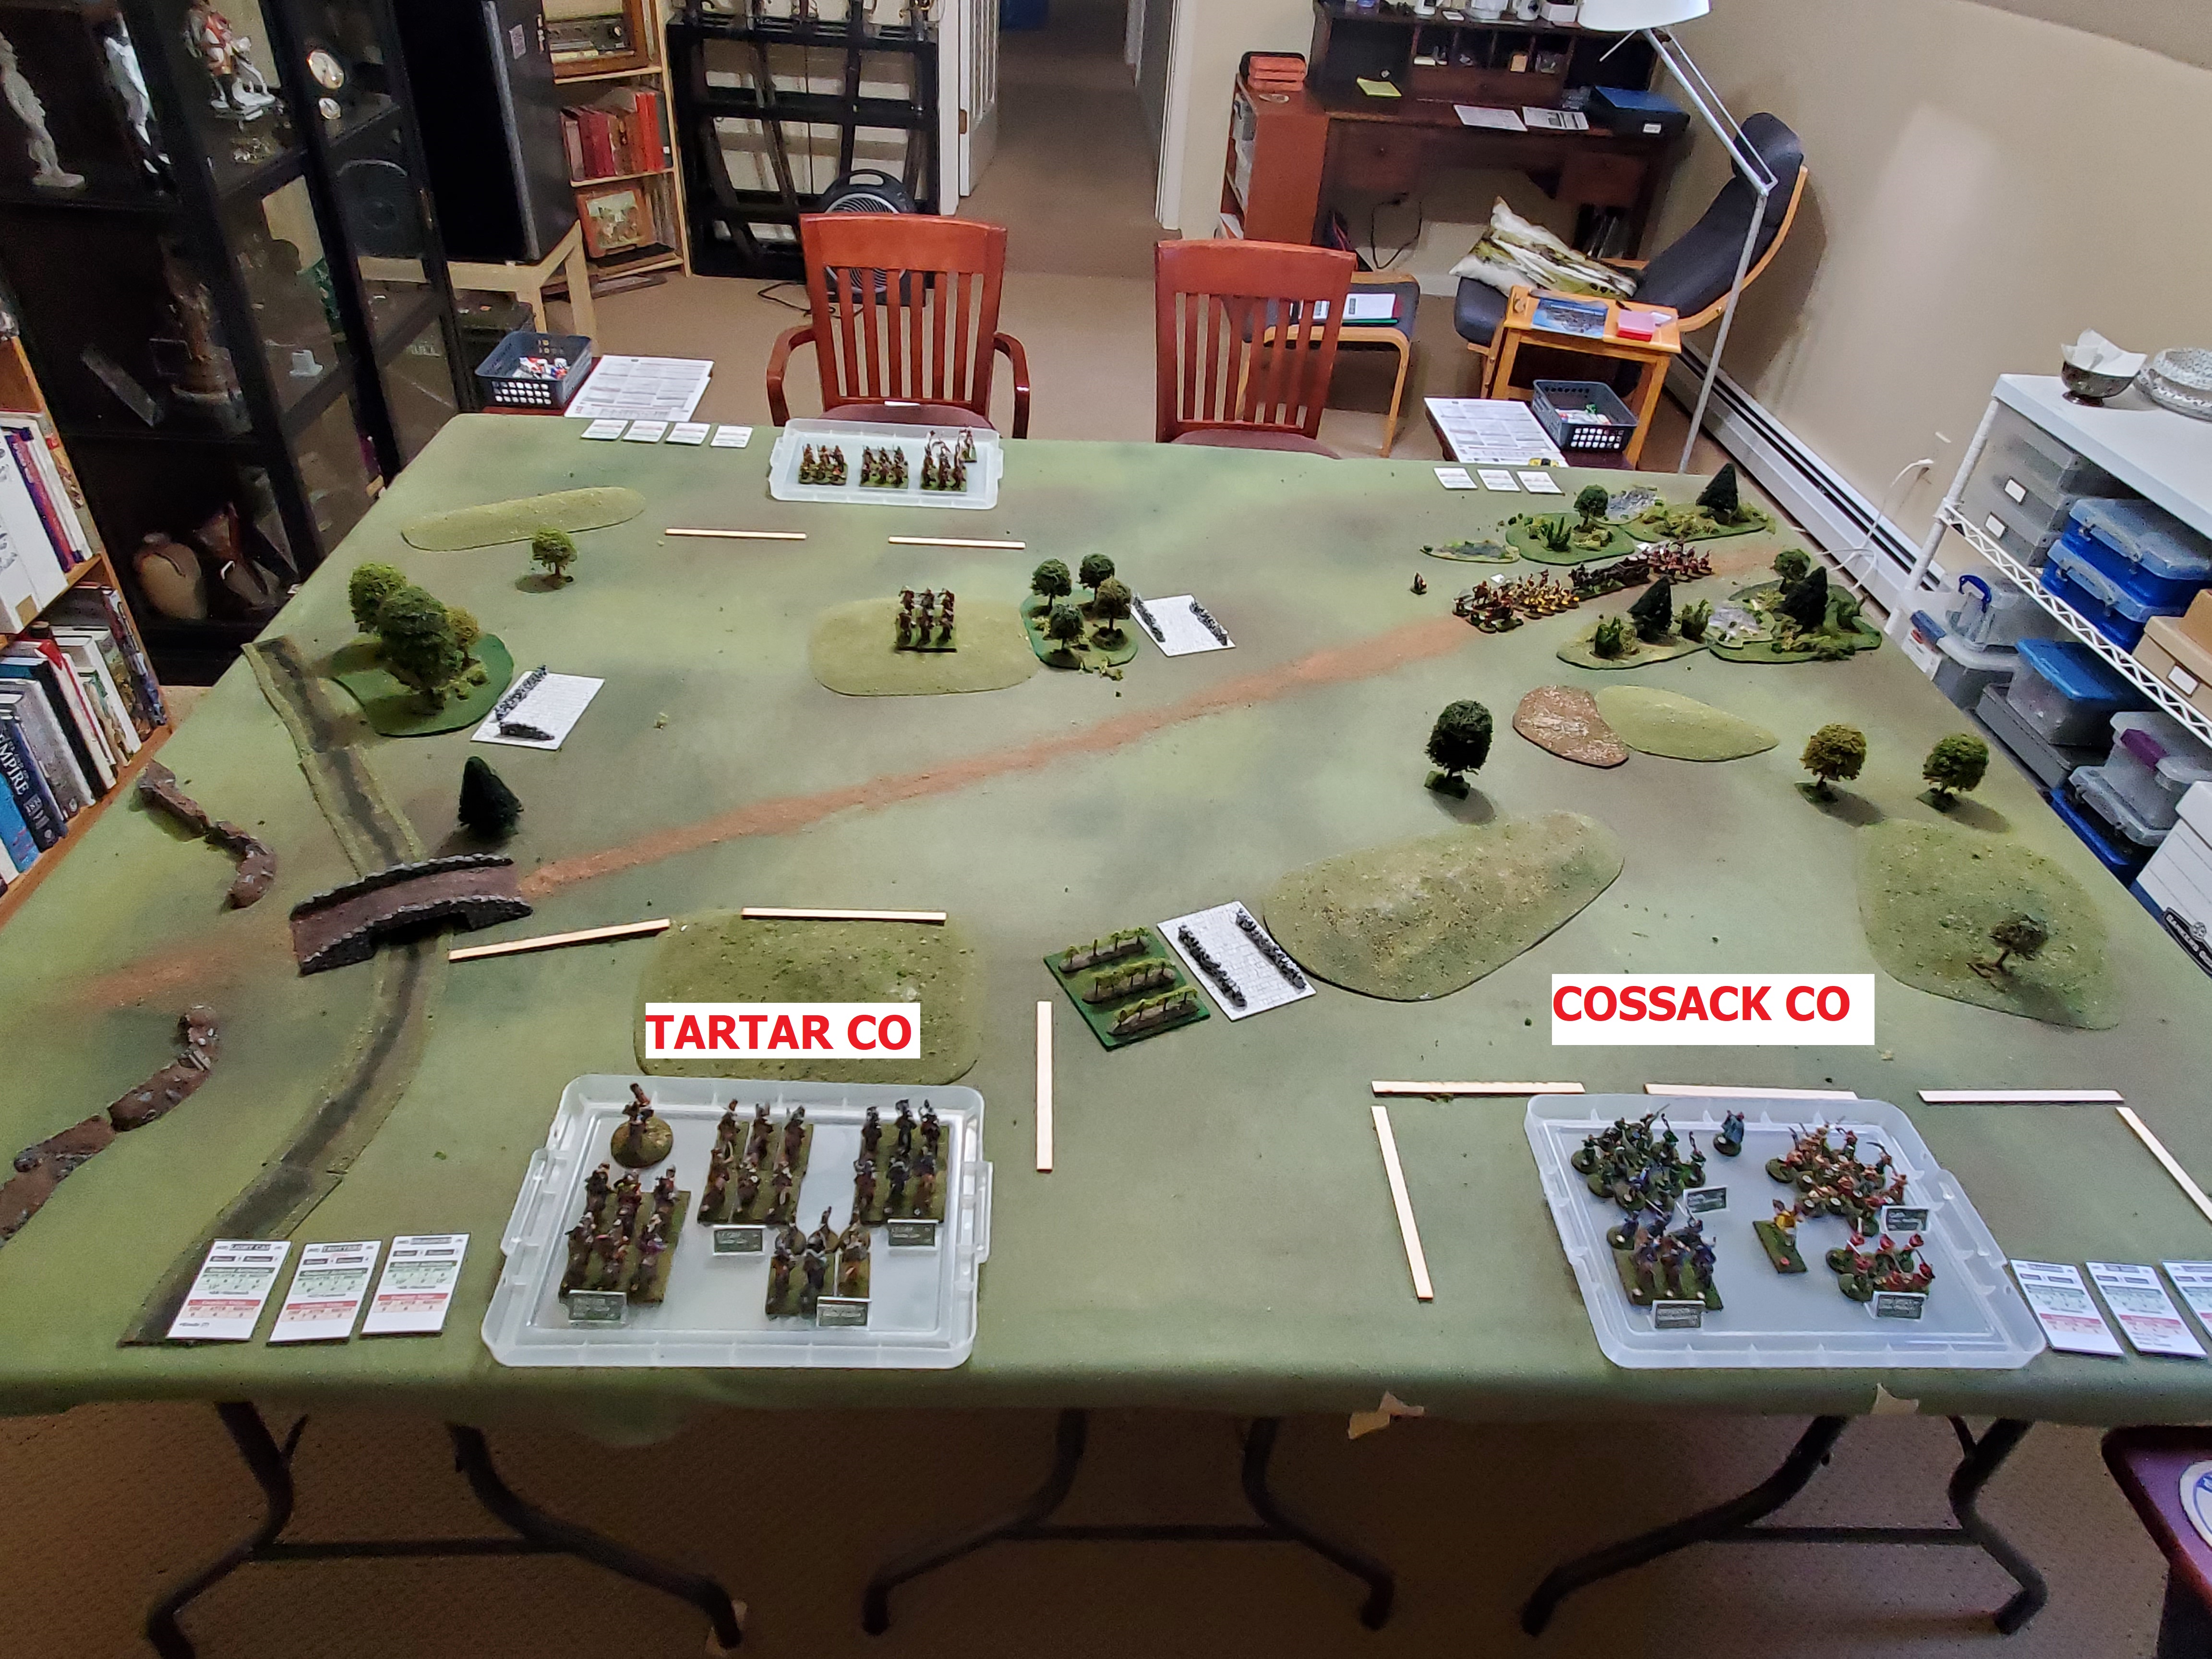
The Polish situation has the convoy with escort entering from the lower left of the table along the road being met by a force of friendly cavalry coming up parallel to the river on the right.Each of these is organized as a Pikeman's Lament company, with each player running one. The convoy company consists of two shot units (Haiduks), the wagon/wagon guard (Custom unit), and a veteran dragoon (Polish Dragoon), plus leader, who can be assigned to any unit. The Polish cavalry company consists of a light cavalry unit (Croats), a trotter (Pancerni), a dragoon (Polish Dragoon), and an elite, aggressive galloper (Winged Hussar), plus leader. The convoy starts in-place. The cavalry company starts with the light cavalry (Croats) posted on the hill, with the remaining units deployed by the player anywhere on a line 12" behind the Croats. The Cossack/Tartar side of the table: getting wind of the convoy, the local Cossack Hetman on the other side of the frontier decides to send a mixed force of Tartars and Cossacks to ambush it. The tartar company (above left) consists of two light cavalry units (Tartar Cav), a Dragoon (I called them Tartar Haiduks for this game), and an elite trotter (Tartar Ulans--aka, nobles). The cossack company consists of two units of clansmen (Zaporazhian axemen), one unit of commanded shot (Platsun), a dragoon (Lysocki Cossacks), and a specialty figure. Each of these companies also included the standard company leader that could be assigned to any unit. We did not play using officer traits/backgrounds nor did we play using the "Double one/Double six" random event table.
We did play using a new unit type (light cavalry) and a modified version of dragoons, the stats for which are above. Creating these necessitated that I come up with revised player reference sheets, unit matrixes, and unit cards, all of which can be found and downloaded on the Pikeman's Lament Resource page of this blog (where you'll also find a bit more explanation: scroll down to area "F" on that page). In this game I once again employed the mini acrylic sign place holders as an aide to help identify units (these made their debut in my Koniggratz game). They served a dual role: not only did they help to identify units, but they also provided a quick and easy way to track unit activations: above left, the upright label indicates that the unit has not been activated; above right, the label flipped down shows that it has been activated. At the start of the turn, you flip all the labels face-up. The game is afoot: Mark D (left) took charge of the Polish Cavalry Company and George (right) controlled the Polish Convoy. Ralph (who I unfortunately did not get a picture of) took the Tartar Company and I took up the Cossack Company.
The Tartars and the oncoming Polish Cavalry maneuver for advantage.
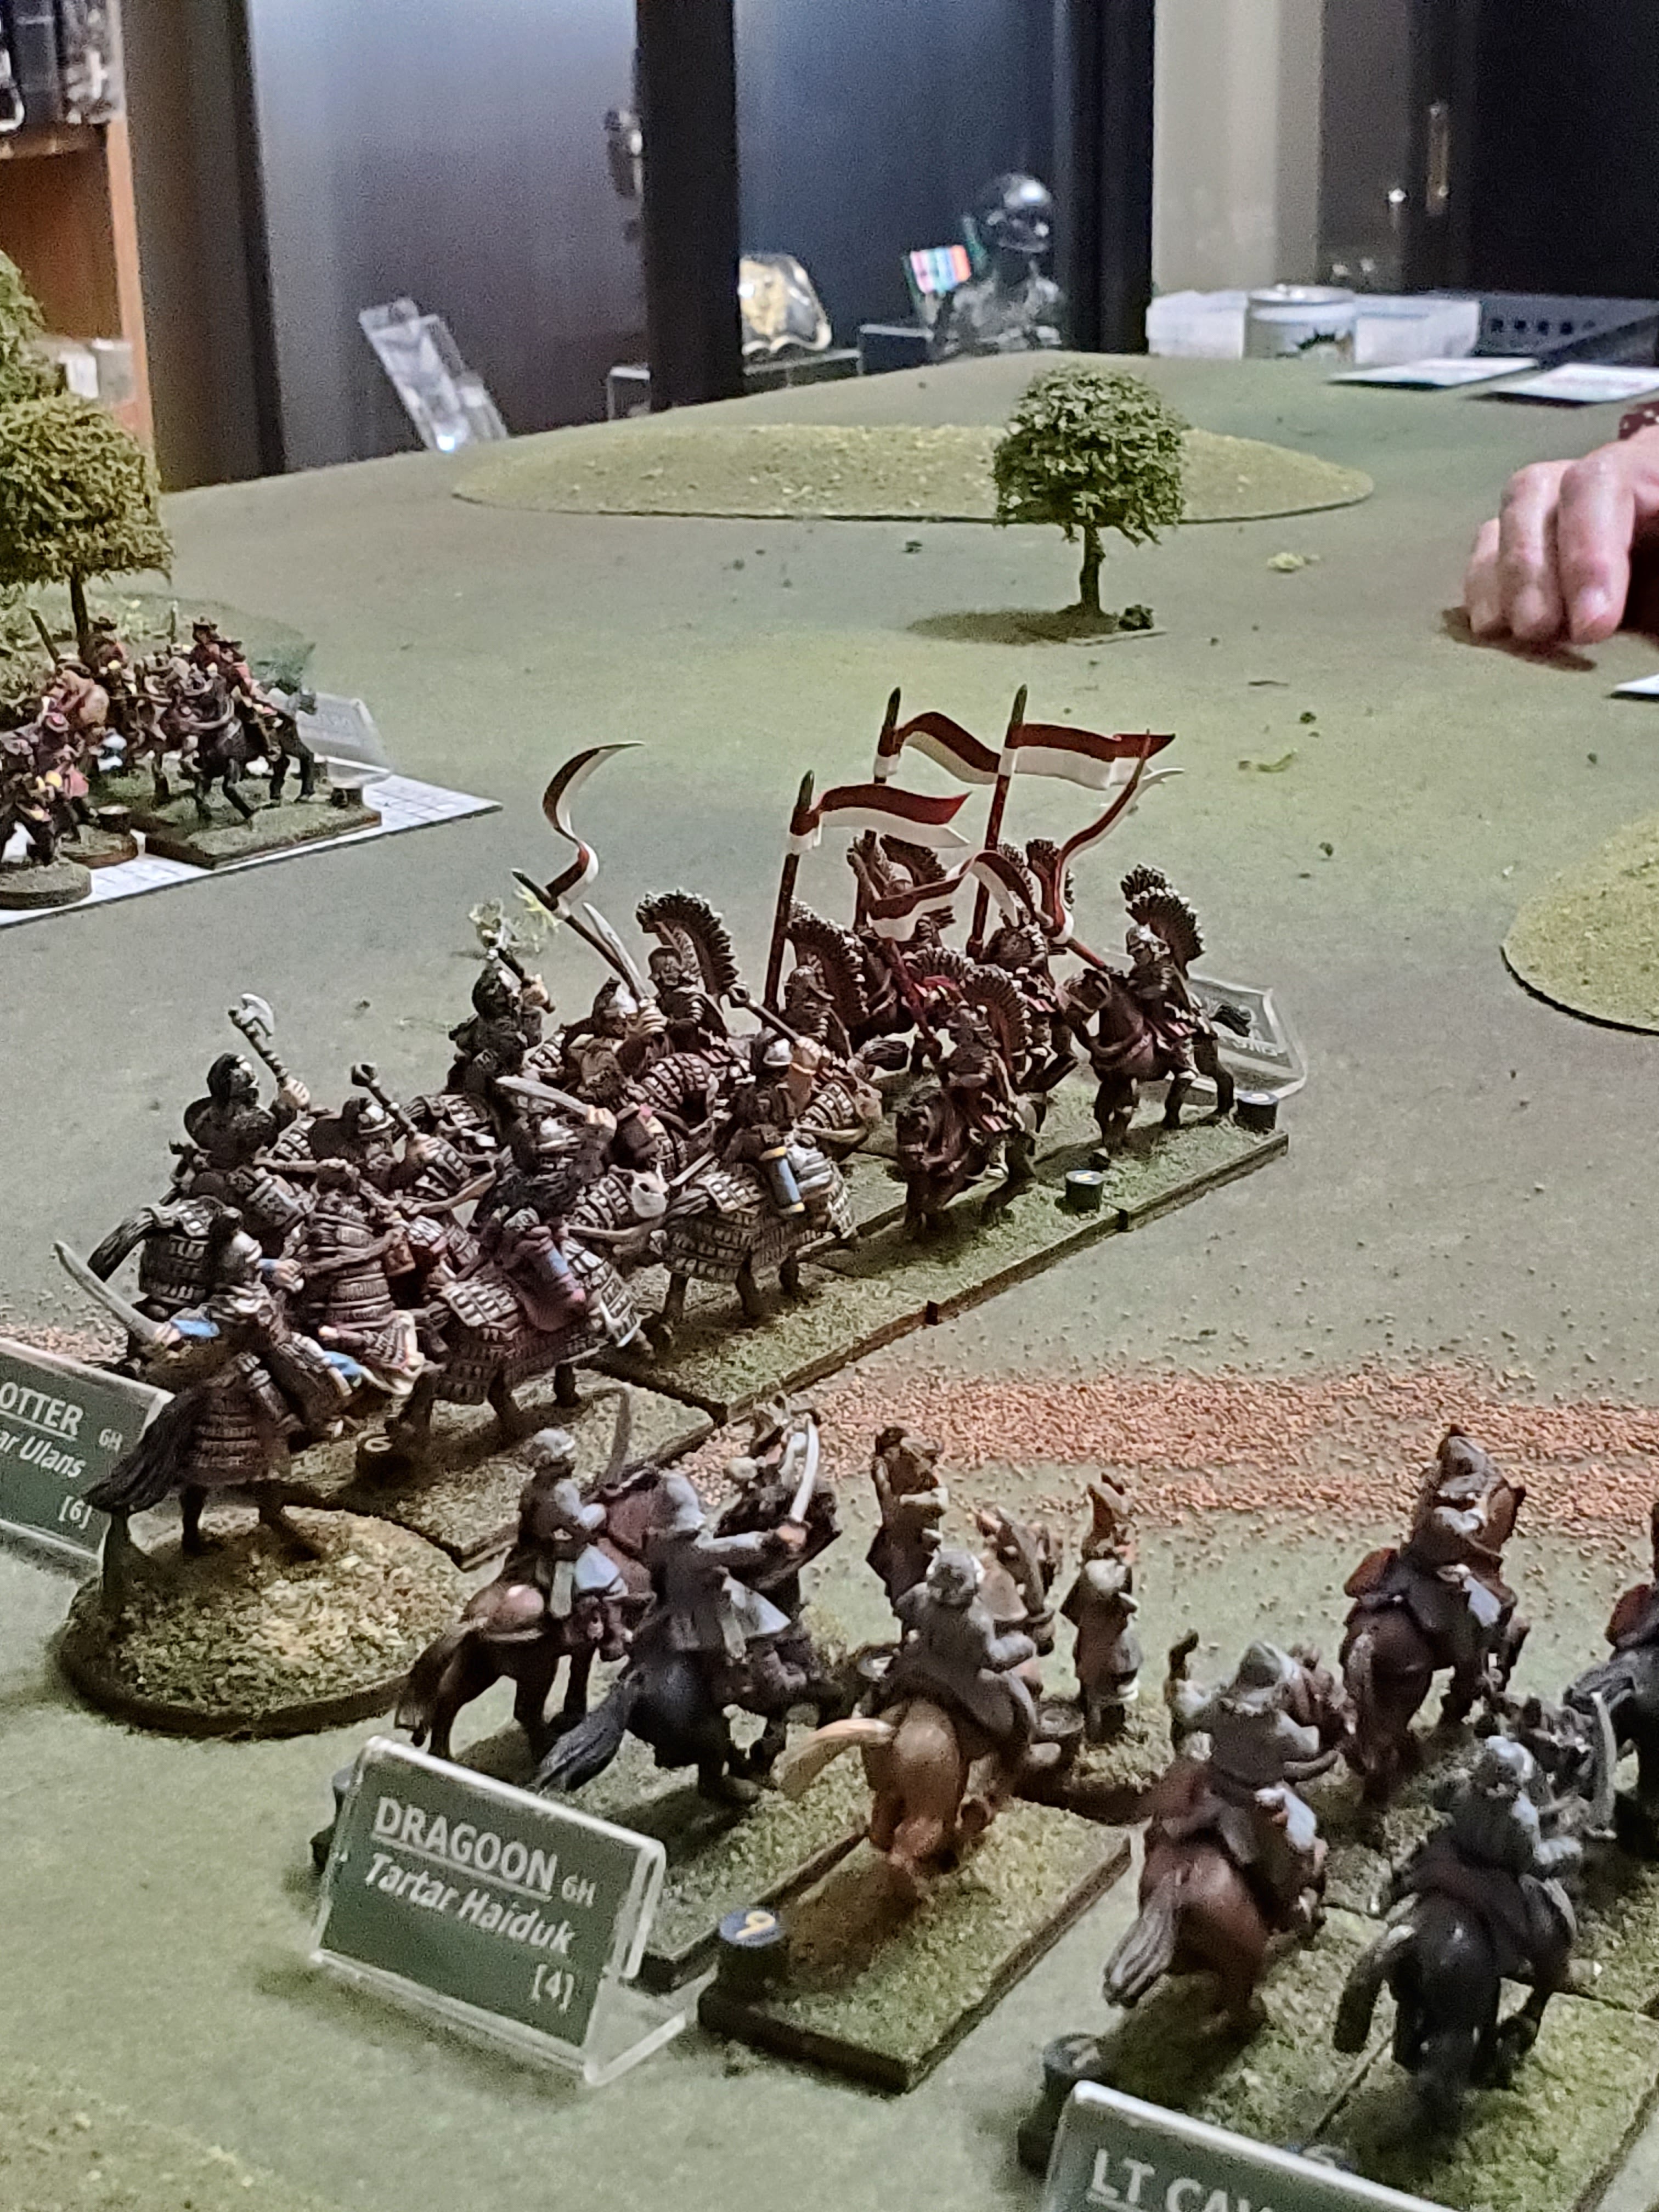
On my side of the table, my Platsuns (commanded shot) move up in support of my clansmen and dragoons, while George's Haiduks come forward to protect the wagon. In what would prove to be the decisive chain of events, Mark moves his Winged Hussars forward, who would wind up colliding with the Tartar Elite Trotters due to a "Wild Charge" activation. That would result in the elimination of the best unit on the Cossack side (the Elite Trotters), plus the end of Ralph's commander (who was with them). By the way, early on--on my side of the table--my company commander was also seen off when his unit got clobbered, so we operated without the benefit of the company officers for most of the game...but I digress. The damaged but still potent Polish Winged hussars then wild charged into Ralph's Tartar Dragoons, and generally pinged about in follow ups and wild charges, doing much damage and chaos amidst the company of Tartars... Meawhile, out on our right, my Clansmen had wild-charged themselves across the table and taken out George's veteran Polish Dragoons, but then followed up and gotten themselves wiped out (and my company leader with them). My Dragoons got shot out of the saddle by George's Haiduks, and my Platsuns' main contribution from then on was to reliably fail to activate for the rest of the game (at least it made for short turns!). My one remaining Clansmen, at this point, is out of the picture: it had failed a morale check when on the verge of closing with the wagon and did not manage to rally for the rest of the game (but at least it didn't rout). 
One of the big things we wanted to see in this game was how the new light cavalry and modified dragoons would play. The consensus was favorable. We'll continue to use these alternate units in our PL games. I invite anyone out there who is reading this to give these unit types a try in their games (and feel free to get in touch to let me know how you found them).
Even if we weren't at the convention, we had a grand Friday Night playing with toy soldiers. Thanks to Mark, George, and Ralph for playing!