The end of our Koniggratz game with my recently received Pattern M1861 Austrian Cavalry Saber (Officer's) on the map among the other apparatus. This is the same pattern of saber that was carried by the Austrian cavalry in 1866 (and just made for a nice picture).
In this post, dear readers, we follow up on our promise (threat?) of taking the next step in gaming Bloody Big Battles at the half scale using Kriegspiel Blocks on maps. To "stress test" the system, I decided on running a full-up game of the Koniggratz scenario (one of the largest). For those interested in BBB, I've posted all the scenario materials for download on my Bloody Big Battles Resource page. Although I play at half scale, these materials will work for regular BBB as well (have an eye out for deployment distances, would be the only thing). On to the report: as usual, you may clix pix for BIG PIX in this report. In this report, I'll cover a bit more on how I managed this game and then on the game itself.
THE LOGISTICS
I put together the Koniggratz Kriegspiel map at half size. leaving off the bottom row of map sheets. This configuration fit nicely under two sheets of 27" x 40" plexiglass laid side to side, with the 40" axis running north to south and the 27" axis east/west. In order to provide a base for the maps to lay flat and also to hold the plexiglass, I used four sheets (20" x 30") of corrugated plastic: these worked out well. The map was stable and even could be shifted about a bit. This provided a half scale equivalent to a playing area of a bit over 6 feet by 6 feet.
I used water based Staedtler Lumocolor pens to highlight some of the contour lines and other terrain features. These are durable enough to not smudge during play but will clean up easily with Windex afterwards.
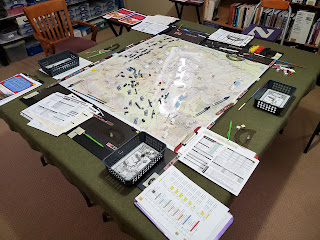
I provide complete details on the apparatus I use to support half scale gaming with KS blocks on my BBB Resources page, so won't reprise all of that here. There is one addition, however, that I will add. I put inch-scales along the edge of the map under the plexiglass. Players use these to set their dividers to 1"-4" increments in order to "walk off" their moves on the map. These worked well. The above picture also provides a good feel for the layout of the map and associated plexiglass, etc.
Above left, I put unit labels in mini acrylic place sign/place holders (labels are available among the scenario downloads on the BBB Resource Page). Above right: looking from the Prussian side to the Austrian, the labels are barely visible (more on this later, though). I stumbled across these nifty little things on ebay and can see many uses for them in other games as well.
THE GAME
Translation of the BBB Scenario to the KS map. Above left, the Austrian deployment. Above right, the Prussian deployment and arrival schedule. For those not familiar with the battle, the Austrian army (with their Saxon allies) deployed with five army corps in a semi-circle behind the Bistritz river (on the left) bending around to the Elbe (on the right) with a large central reserve of two army corps, two cavalry divisions, and an artillery park behind. Three Prussian armies converged on this position, First Army (from the Northwest), the Elbe Army (from the Southwest), and Second Army (from the Northeast). At the start, only two corps of the Prussian First Army are on the field. This is the classic case of interior lines (Austrians) vs exterior lines (Prussians). In our game, George and Byron played the Austrians and John M, Earl, and Mike C the Prussians.
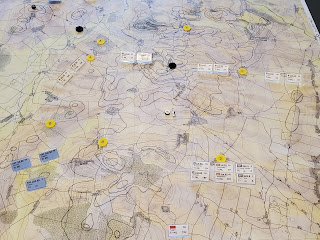
Above: the diagram translated to the game map. Before the game, I placed the unit labels on the map as a handy way to mark the deployment areas for the players. The above shows the Austrian deployment area. George commanded the north (II, V, and III corps) while Byron took the west (Saxons, and the Austrian X and VIII Corps). George also took overall command, allocating the reserve. The discs on the map are victory objectives. The Prussians must take five of them to win, four is a draw, and three or less would be an Austrian victory. The black markers are fixed objectives, while the yellow are variable (they are in lettered pairs, the final location of each to be determined by a die roll--done only after the Austrian deployment).
The start of the battle from the Prussian side. The starting positions of the four Prussian First Army divisions (yet to be deployed) are marked by the labels. The stage is set...
...the early stages of the battle: the lead division of the Prussian Elbe Army has marched in (to the south) and the rest of First Army is coming in from the Northwest corner.
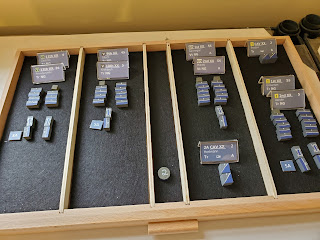
The Prussian Second Army in its tray, still off map and waiting to enter from the Northeast (starting on turn 3). Mike C, being versed in BBB, graciously accepted this command, helping to facilitate the game until it arrived. You may notice the "SA" markers in the above. Given that most artillery in this scenario are rifled (RA), to save clutter, only smooth bore artillery are marked (SA); all others are assumed to be RA.
The flow of the battle. Byron, commanding the Austrian left, marched the VIII corps from its position in depth to extend his line and prevent John M (Elbe Army) from getting around the Austrian left. The reserve cavalry divisions were sent his way as well. In the north, George moved the Austrians up from their initial line the next ridge (much like the Austrians did in the real battle), running into the arriving Prussian Second Army coming down from the North. Earl's Prussian First Army hit elements of X and III Corps in the Austrian center. Objectives are highlighted in the above image (I pulled the markers and drew them on the map once we had diced for them).
Above: the view of the action in the south, from the Austrian perspective (left) and from the Elbe Army perspective (right). Most notable event here was John M's Prussian artillery rolling "boxcars" and taking out one of Byron's reserve cavalry divisions in a single shot. Otherwise, things were fairly stable, with the Elbe Army moving methodically towards the strong positions held by the Byron's Saxons and Austrians behind the Bistritz.
...a closeup of the key action in the center. The lead Prussian divisions are disrupted from their assaults, but the Austrian formations have been pushed back from the Holawald sector and spent. There are two divisions coming up from behind, so they could probably form another line behind this gap, but the Saxon line to the South could be compromised (at the very least).
Meanwhile, to the right (and north), the Austrian advance (left), is confronted by the now completely arrived Prussian Second Army (right). On this wing, both players had some activation rolls that hamstrung operations. The jagged advance of the Austrians was caused by some of elements not moving whilst others did. Not to be outdone, Mike C managed to roll so badly that the entire Prussian Guard Corps just sat for one turn. Thus both players essentially lost at least one turn on this wing and units had not gotten into contact yet.
We had started at 7 pm, and by this time, it was going on 11pm, so we called the game, which progressed more slowly than we had thought it would. The point of the game, though, was to get a "stress test" with multiplayers on a larger game like this, so a success in that regard. On that score, probably the biggest lesson learned was the different--closer--focus level when playing on a map as opposed to on a table with minis. It was much more absorbing; I'm not sure if that would necessarily mean smaller commands per player to compensate--we also recognized that we had not played BBB for awhile, and for many this was only the second time through. By the time we had to call the game, players were starting to get the hang of things and we all agreed that more familiarity with the rules would have meant a faster game--so the lesson might be that the larger the game, the more important fluency with the rules is going to be when playing in this context (as opposed to a conventional mini game where even in larger games players may be able to just walk up and pick up the system). As far as the feel of the game, the big difference that was appreciated by all was that this style of game provides physical depth to the battlefield that is rarely achieved in a standard mini game, rendering a higher level of grand tactical/strategic level of play: it looks and feels like managing a battle--a Bloody Big Battle (to put it one way).
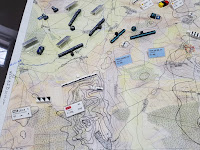
One other point brought up was that the unit labels, although useful, tended to clutter up the game. At full scale using minis on 3d terrain, this would be much less of an issue. However, it detracted more from this game given the half scale and the map. I pulled the labels and took the above shot as an illustration of the difference between a clean table and one with the markers. Given that the blocks are generic, there is a need to provide some sort of on table information. More on this as it develops.
In the meantime, it was a fine way to spend a Friday evening among friends, and a good time was had by all. My thanks to George, Byron, Mike C, John M, and Earl. I'm looking forward putting on the next game!
Excelsior!


Great looking game Ed!
ReplyDeleteThanks, Ray.
Deletei agree with Ray....I have never played this type of map based game but it does seem like there are aspects that you don't get with figure gaming
ReplyDeleteIt is a tradeoff. What you drop in 3D figures on table you gain in scope--it's easy to overlook that it is also a half scale variant of an already high level game system (BBB), which expands the purview even further.
DeleteThat is a great looking game, that as you say, does give the look and fell of grand tactical wargaming. The dividers to help with movement is a clever idea for sure.
ReplyDeleteEven in out smaller games of BBB, it does take a while to get back into the swing of things before the game flows smoothly. Even then sometimes we struggle to remember/locate the finer points in the rules. I'm sure once you become more au fait with the rules again the game will play more quickly.
Good points, Steve. For awhile, our group played Volley and Bayonet so much that the rules/system had become second nature. We're just getting started with BBB. I expect that we'll be able to move along much more smartly with practice (and focus more on the game).
DeleteA very interesting post Ed, it has been many years since I did blocks on a map, but those moments have stayed with me for their excellent emersion.
ReplyDeleteHi Norm. the deeper immersion was/is definitely something that players have found rewarding, and which has overcome initial reservations about the substitution of KS blocks for figures on the table.
DeleteThis is really a nifty exercise, Ed. Are you sure you are not a boardgamer at heart? Your approach reminds me very much of the block wargames produced by Simmons and Mercury. I am thinking specifically of,
ReplyDeleteGuns of Gettysburg https://boardgamegeek.com/boardgame/36400/guns-gettysburg
Bonaparte Napoleon at Marengo https://boardgamegeek.com/boardgame/15839/bonaparte-marengo
et al.
Looking forward to seeing more of this.
Hi Jonathan, I've got both Simmons games titles, so understand what you mean. As far as being a closet boardgamer, the older I get, the less sure I am about anything :)
DeleteNo need to pick just one. There is a ton of cross over games that are similar and as you say; boards like this tend to have the big battle feel in a space more doable than if you tried it with miniatures. Nice job. Stress test success. 😀
Delete"the older I get, the less sure I am about anything :)"
DeleteVery funny and so true.
A lovely looking game Ed…
ReplyDeleteI can see how the labels are useful but I have to agree that the cleaner table looks much nicer…
All the best. Aly
I think that in a smaller game with a more linear structure, the labels might not necessarily have to be co located with the units but kept closer to the edge of the playing area and arranged so that their correspondence to units would still be clear...until I c o me up with something else!
DeleteAbsolutely fascinating.
ReplyDeleteExcelsior!
DeleteI got a sneak peek of this but these photos and narrative give a much better impression of what's going on. Lovely stuff!
ReplyDeleteNow that I've proofed it with the BBB players, I'll be expanding to introduce others. You're top of the list (watch for an invite).
DeleteLovely stuff. When you say you printed the map out in half scale, do you mean A5 sheets as opposed to A3? Did you print it out as a one piece? I may be acting a bit thick here? 🤣
ReplyDeleteGood questions, Dangerdaz, Happy to answer. In my Jan 31 post I illustrate how the component pages went together to create the map. Each was printed on a US standard letter sized sheet of paper (8.5" x 11"), which translates most closely to UK A4 (8.3" x 11.7"). The image size, however, fit inside the sheet, so I don't think the page size difference would matter that much. As far as half scale, that had to do with resizing the source image (taken from the pages of the Kgrtz kriegspiel map: it is pdf, but you can use several products to copy those images into pdf and use them). You might also check out my Dec 16 post which has a bit more on the process--and if you haven't found it yet, hit the tab at the top of the blog for the Bloody Big Battles Resource page where I have a downloadable pdf on creating the kriegspiel appartus. Hope this helps!
Delete