Monday, September 16, 2024

DANISH HUSSARS (CHOCOLATE BOX WARS): A RETURN TO THE PAINTING DESK


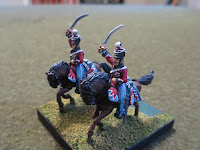
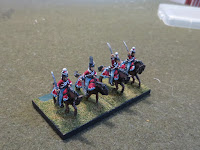
Danish Guard Hussars of the 1st Schleswig-Holstein. 

Followers (long suffering) of this blog may recall that I basically hung up my paint brushes back in March 2022 with the completion of my Prussian Cuirassiers.  I have done some painting since then, but as planned, it has been small "round out" projects and nothing regular (or major).  Recently, I had reason to unbox my paints and make a mess again after a long hiatus, which is the subject of this post. As usual, you may clix pix for BIG PIX. 
The Danes of the 1st Schleswig-Holstein War were the first contingent I completed for my Chocolate Box Wars (and VnB Continental Mid Century Wars Variant) project.  I have since expanded upon the units in the above photo, but they remain the smaller of my forces. Still, they are the senior contingent, and  as such, they hold a special place in the CBW establishment here in Meanderer Barracks. 

Followers of this blog may also be aware of the conversions and repurposing of figures I've done to complete the various CBW contingents. This was particularly so when I started, and with the Danes in particular. Casting about for figures to represent the Danish cavalry, I used Northstar Austrian 1866 Dragoons for the Danish Dragoons and Horse Guards (more on that in a bit), and the closest fit I could find for the Danish Guard Hussars (pictured at the top of this post) were in the Irregular Miniatures 28mm line...
...the Irregular Miniatures Wars of Italian Unification Austrian Hussar 

I put these Austrian hussars on the Irregular Miniatures Prussian Hussar horses/horse furniture, and then free handed the details to represent the Danish Kit. Not a bad result, I think. As new figures became available, however, I found myself "upgrading" my original CBW contingents...
...for instance, my initial Prussian cavalry contingent were all Foundry figures (above). But as Northstar expanded their line, I went with more contemporary figures...

...painting up new Dragoons, Cuirassiers, and Hussars (also uhlans, but those were new and not upgrades). 
Eventually, Northstar produced some Danish Dragoons (left most unit in the above), and I added them to the Danish horse. So, three out of four of these units were contemporary figs (the red coated dragoons and the yellow coated horse guards are the conversions of Northstar 1866 Dragoons). Thus, I thought it was time to cast about to see if I could upgrade the Danish Guard Hussars to better fit in with the others. And so I began to look about...
...and I found some additional information and references (first of all). The above images come from a Danish Website (worth a look).   According to one source, I  read (I forget where) that on campaign the Danish Hussars wore either the Attila (the blue jacket in the top picture) or the Pelisses (the red fur lined jacket in the below), but they did not wear the pelisse draped over the shoulder in the Napoleonic style. Thus, if I could find hussars wearing the pelisse, my upgraded hussars would look very much like the trumpeter above: red coat, blue trousers, bold horse furniture, very cool. Now, to see if I could find figures (because nobody makes these, of course)...
...and checking into the Perry Metal Napoleonic figures, I found these Danish Hussars (1813/14) wearing pelisse in the  Danish Norwegian Army. The shako is not quite right, and a bit busy, but otherwise, close enough to work with. Here's what I did...
I picked up the command and trooper attacking packs, and I snipped off the plume, leaving just a bump there, upon which I then sculpted a pom pom out of green stuff.
To get the lines of the mid century trousers, I shaved off the buttons on the coveralls and smoothed the legs.  
For the officer, I clipped the plume a bit, and then added the hanging plume using green stuff (something I got plenty of practice with when doing my Russian Uhlan conversions). And here is the outcome...
The stand with the Officer and trooper. 
I brought out my Hungarian Knot shortcut to add a sleeve loop to the officer. 

A few detail shots for anyone who is interested in these figures. I must say that in naked metal, I had to study them for several days to understand what I was looking at and how to approach them.


To bring out and make distinct the complex lines of the strapping, shako cords, flounders, buckles, buttons, and braiding, and to help the white stripe on the light blue trousers stand out, I used my underpainting method (also known as "lazy man's blacklining"). I first painted these details black and then went over them in white or metallic,  leaving a bit of the outline to delineate the features from one another. The pom poms are actually light gray as opposed to white: not something you notice explicitly, but something that helps with the look of the figure. On the shako, I only painted the long cording consistent with the latter uniform white, leaving the other cords black with the shako. There is also a thin wash of black and a drybrush of lighter red and lighter blue over the uniforms and saddle blankets (again, not heavily done, but enough that they don't look block painted). The fur edging on the pelisse, the officer's hanging plume, and the horse tails and manes are black with a drybrush of "gunship gray." The horses were done first in burnt umber then drybrushed with burnt sienna--and then given a light blackwash and drybrushed lightly with burnt sienna again.  All paints are flat enamels (Model Master, Testors, Humbrols, and True North). 

The Unit:


Getting a consistent look across the sabreteches and the edging on the shabraques took some doing. I spent as much time painting the horses/horse furniture as I did the riders. But the small figure count of the Chocolate Box Wars system allows for this kind of attention: I don't think I could have maintained this level of control for 24 figures!


A set of non close up views: what the unit looks like when seen at gaming distance.

A demonstration of the difference between the contemporary Perry figures (left) and the original Irregulars--for which I still maintain a soft spot. They will assume their proper place of honor alongside the other figures I've retired. 

Being the senior contingent in my CBW forces, I added a separate trumpeter command figure, something I have done for my Prussians, Austrians, and Russians. 
The new Guard Hussars take their place alongside the Horse Guards in the Danish Cavalry Division, now led by a trumpeter command figure.

Now the Danes have a hussar unit with figures that can stand up to their Prussian counterparts on the table. 

Excelsior!

Monday, September 2, 2024

SWORD LORE II: M1852 PRUSSIAN CAVALRY SABER


Prussian hussars sporting the 1852 Prussian cavalry saber

Having recently completed the research for a newly acquired sword, I thought I'd share what I've come up with in another Sword Lore post. By coincidence more than design, this particular sword (and post) follows from the previous Sword Lore covering my 1811 (Blucher) light cavalry saber. Also by coincidence, this is the sword that came after the "Blucher." In this post, as usual, you may clix pix for BIG PIX...

THE BACKGROUND: FROM 1811 TO 1852 
This sword's predecessor, the 1811 ("Blucher) light cavalry saber, served as the primary mounted weapon for the Prussian cavalry (except for the cuirassiers) from after the Napoleonic wars through the First Schleswig Holstein War (1848). For a complete history on the Blucher, see the previous Sword Lore post (link above). After three decades, it was time for a change. The Blucher light cavalry saber, with its hatchet point and curved, thin, broad, blade, is a slashing/cutting weapon, representative of its time when the distinction between cut and thrust, and light and heavy cavalry, respectively, was still very real. By mid century, the heavy cavalry would still remain distinct, and carry a distinct weapon, but the differing roles and definitions of other cavalry types were fading (as far as swords: the rise of the lance is another topic). As such, the 1852 is reflective of this trend, being a hybrid  sword incorporating cut and thrust: the 1852's blade retains a less curved cutting edge, but 
is thinner and stiffer, with a spear point for better thrusting. The last 1/4 of the blade (the "tip") is sharpened on both edges, and so can also provide a back-slash cut. 
The other major change was to the hilt. The 1852 retained the same grip as the Blucher, but the stirrup guard was no longer considered adequate. The 1852 has an asymmetrical, three-barred basket shaped guard that provides much better hand protection. 

The 1852 Cavalry Saber was issued to the Uhlans, Hussars, and Dragoons. 
(cigarette card scans are from the author's collection)

THE SWORD
This is a service saber: a weapon that was produced to Army specifications, purchased by the state, and issued to troopers. 
An overview of the government markings. Before addressing these, I should point out that a "sword" is made up of two parts: the blade and the hilt. There are many variations of sword, and within each sword type there are many variations and permutations of hilt and blade (and blades and hilts are composed of different kinds of parts as well). We won't go into all of those (for good reason). However, for the purposes of this illustration, I'll first cover the blade and then the hilt. 

THE BLADE
I've already described the blade characteristics, so we'll move on to the markings. 
Ricasso: This is a block at the base of the blade next to the hilt. It is common to find a maker's mark here, and so it is on this blade. It was manufactured by the well known firm of P.D. Luneschloss, Solingen. This firm started production of edged weapons in 1848 and continued through both World Wars (expanding into bayonets). It also produced edged weapons for both the Federal and Confederate forces during the American Civil War. 
Spine: This is the back of the blade (unsharpened). At the base of the spine, next to the hilt, are government markings. The Crown over FW (Friederich Wilhem IV) indicates that the blade has been accepted into the inventory of the Prussian Army. The Number: 56 = the date (1856). The Crown over a Gothic M = the Army Depot (M = Meissen) is where the blade was proofed and accepted.

THE HILT  
Like the blade, I've already covered the characteristics, so we'll move on to the markings. 
Ferrule, Backstrap, and Guard: The ferrule is the ring at the end of the hand grip next to the blade. The backstrap is the piece of metal running along the top of the grip (not all swords have these). The guard speaks for itself (this picture shows the left side of the guard, opposite the bars). Each of these has a small Crown over Gothic M Depot mark, indicating that these components were put together (and proofed) there. Given that the depot marks on the hilt and blade match, it is likely that this sword was assembled at the Meissen Depot. 
Quillon: This is an arm of a crossguard. When this term is used, it often refers to an arm that extends outwards from the guard, often ending in a curl (as in this case).  Up until now, the kinds of marks we've examined are generally present on most military swords, still very interesting (don't get me wrong).  One thing that sets German swords apart, however, is that you can read their unit histories, which are stamped on them (see my post on the 1811 Blucher for a more complete explanation of these conventions). Of course, it takes a bit of digging and research to decipher them. Here is this sword's history: 

In this case, the unit stamp is on the quillon:  
1. W. U. 5. 50  
The unit stamp sequence for cavalry is: 
Regiment  .  Unit Type .  Squadron .  Weapon # 
So, this was weapon #50 of the
5th Squadron, of the 1st (West Prussian) Uhlan Regiment
There are variations on the unit stamps: in this case, the insertion of the "W" after the regimental number appears to be a local convention, probably because this particular stamp, given its placement, is organized vertically, with the regimental designation on the first line, the squadron on the second, and weapon information on the third. In other cases, the unit stamp is horizontal, with all the information on one line separated by periods. 

There are no other markings on this sword, indicating that it was not reissued to any other unit. Unfortunately, there is no scabbard, which would have its own markings, so there is no other information to be gleaned. 


SERVICE LIFE
Two Prussian Uhlans, circa 1867: detail of 1852 Saber.  
(Christian Sell, Wikimedia Commons)
Colorized period photo of a Prussian Guard Hussar with 1852 Saber. The Guard Hussars initially had their own sword, with a different guard, but were issued the M1852 sword in 1861.

My sword collection is focused on actual combat weapons, specifically service weapons, which is why I was on the lookout for one of these. This was the last sword carried into mounted combat by the Prussian Army. The Prussian cavalry carried it through all the major conflicts of the period: the Second Schleswig Holstein War (1864), the Austro Prussian War (1866), and the Franco-Prussian War (1870-71).  The sword would continue until the end of the decade, when another version would be introduced. Although it would still be officially designated as the 1852, the updated version is better known as the 1852/79 (and is beyond the subject of this post). 


OFFICER'S VERSION
I do have an officer's version of this sword. These are actually more common than the service versions (in terms of collecting). 
The term "Officer" might be more accurately termed "Private Purchase" since non commissioned officers would also often purchase their own swords. The private purchase version is the top one in the above image. In general, they are less hefty than the service versions. 
This is a period image of  a Prussian uhlan with what would appear to be a private purchase saber. The arms on the guard are a bit more slender and are more widely spaced than the service version, and the scabbard would seem a bit on the slim side for holding a service blade. Then again, this could be a prop used for posing for photographs, although the fact that the scabbard loops are connected to his carrying belt makes it likely that he was the owner of this sword or he wouldn't have bothered.
Details of the hilts on my officer's and service swords. You can see the difference in heft of the private purchase hilt vs the service one. You can also see that the private purchase grip has a very attractive fish skin grip and a very fine--decorative yet functional--silver wire wrap. When you see workmanship like this, you understand why a jewelry firm, like Tiffany, could also be involved with sword making. The private purchase sword is also nickel plated. This was more attractive, it is true, but it began as a form of low maintenance protection (another reason to buy your own sword: less upkeep).  You can also see in the right hand picture the leather finger loop inside the guard. I have mine wrapped with velcro to keep it from disintegrating. These normally don't survive: my service sword has the screw where the loop was fastened, but the leather loop itself is long gone. 
Unlike service swords, private purchase swords generally aren't marked, except for the maker (and possibly a date if you're lucky).  I wasn't lucky here. Therefore, they are generally harder to get very specific about, other than the pattern and nation.  This maker's mark on my sword is for Clement and Jung, Solingen, Germany. They started production in 1860 and began by making tableware, but by 1861 they were  providing weapons to the North during the U.S. Civil War. The scabbard (not shown) has two rings on it--in the German Army, the bottom rings of scabbards were removed after 1880 or so (and new ones did not have them). Thus, with these two pieces of information, we can at least date this sword from between 1861 and 1880. 
Decorated blades are another feature of private purchase swords (and a good reason to collect them). On my sword, these appear to be acid etched as opposed to engraved into the metal, and the distinctions have faded over time, so you have to hold the sword just right and get the light to reflect off of them to see them.
A detail of the intricate decorations on this blade. They run about 2/3 of the way up the blade, from the forte to the foible--and if you've read this far, you are now receiving your prize.  You may have heard these terms, forte and foible, in other contexts. But you may not have been aware that they are derived from sword terminology. The forte is the strongest part of a sword blade (usually at the ricasso). The foible is the weakest part of a sword blade (usually about 2/3 or 3/4 down the blade, at the tip). 


Excelsior!

Related Posts Plugin for WordPress, Blogger...