Showing posts sorted by date for query danish command. Sort by relevance Show all posts

Tuesday, September 1, 2026

DANES V PRUSSIANS: 1st SCHLESWIG HOLSTEIN WAR


The Prussian Advance

Greetings, dear reader(s).  Recently, I wanted to introduce fellow Chocolate Box Wars (CBW) enthusiasts in the club to an alternate use for their CBW armies. Specifically, using my Volley and Bayonet battalion scale post-19th Century variant. In this case, the multi-stand version, which pre-dated CBW and shares the same figure and stand structure.  I had intended that there would be four players with me facilitating, but one of the lads couldn't make it, so I wound up taking up the fourth seat and both playing and facilitating. The players had all participated in the CBW Tournament, so were keene to find an expanded use for their budding Post-Napoleonic CBW collections. As usual, in this post, you may clix pix for BIG PIX.

The scenario was an amalgam of my Frontier Clash and Battle of Schleswig scenarios. I pitted Danes against Prussians in a meeting engagement. The intent of the scenario was to promote engagement so that players would get exposure to full rules system. Towards these ends, each player had two brigades, with a lead brigade starting on the table and the second following. There were 8 objectives on the table, 3 on each side and 2 in the middle.  The side that controlled the most objectives at the end of the opposing side's turn would win the game. Control was defined as having the only unit within 4" of the objective (so if both sides were within 4" it was contested).  Open or contested objectives were marked by yellow chips: flipped to blue for Danish control and Black for Prussian.  
    In this game, buildings were "null" terrain: block line of sight and fire, and cannot be occupied or moved through. Units fight between them, not in them. When using this terrain model, I employ 15mm buildings (one scale down: the figures are 28mm), so their footprints are small, and I can arrange them in groups to shape play.

Illustration of a Lead Regiment with Brigade Units (left) and a follow on Regiment (right)--pictured units are Prussian. The markers on the back indicate the number of hits per battalion (or half Bn/Squadron). The color indicates the regiment. The stand with the number is the waver level of the regiment (when a unit takes a hit, a marker is removed from the unit and placed on the stand--markers are magentized and both the strip on the back of the stand and the tracking stand are metal). The brigade units (and the cavalry squadrons) have square markers: they don't count towards waver. 

The lead regiments for both were organized in "advance guard" configuration, each with a light cavalry squadron (hussars), a half battalion of jagers, and 2 line infantry battalions. Each brigade also had two brigade level units: a Field Artillery Battery and cavalry regiment (a Dragoon for each of the Danish Bdes, and a Dragoon in the Prussiann 1st Bde, and an Uhlan in the Prussian 2nd Bde).  The follow on units in each brigade were 3 battalion line regiments, each with an attached half battalion of jagers. One of the brigade units would deploy with a regiment (player's choice). The brigade HQ would start with the lead regiment. 

Illustration of Army Level Units (in this case Prussian, again)

Each side also had army level units, consisting of a Heavy Cavalry Regiment (Cuirassiers for Prussians and Garde Du Corps for the Danes), an elite infantry units (Grenadiers for the Prussians and the Grenadier Guards for the Danes), and a Field Artillery Battery.  These would arrive anywhere on the baseline between the original deployment areas (inclusive) on turn three--handling and allocation to be determined by the players. The "X" strength point markers on the Army level units indicates that they are independent (and don't count towards waver). 

Prussian Army Command

Each side had an Army HQ stand (of course).  The dice on the command stands (Army and Bde) indicate the number of command points available. These could be used to re-roll morale results or to reduce waver. The Army command points could be used by the Army Command stand or transferred to Bde Commands. Once used, they were gone. If curious about these, see the Rationale and Explanation on the VnB Variant Page. In this game, the Danes had 2 reserve infantry battalions with variable morale, so I gave them an extra command point (Prussians 4 overall, 2 Army and 2 for each Bde; Danes 5, 2 for each Bde and 1 Army). 

Earl (standing, left) and AJ took up the Prussian cause. I was teamed with Mike on the Danish side (but did not get a pix of either he or myself). 

The ball opens:  I was on the right with the Danish 2nd Bde. facing off against AJ while Mike and Earl faced each other on the Danish left/Prussian right. 

Left: A detail of Mike's Danish advance guard and artillery taking up positions. Right: the bully lads of my Danish 2nd Bde bravely advancing to contest the ground vs AJ's Teutonic butchers.

On the other end of the line, elements of Earl's advance guard regiment, a squadron of the Prussian Madgeburg hussars and half Battalion of Jagers, push on under the watchful gaze of the 2nd Bde HQ stand.  

A shot of the conclusion of first stage of the battle, with each side deployed across the field and controlling 3 objectives--the next stage would be the "meat grinder" phase, where the lines would advance to contest the middle objectives. Given that I was involved with playing the game, I did not get any shots of the mix up that ensued...

...however, I can report that it was a victory for Prussian efficiency over Danish elan, but a good time was had by all.  And given that I got thumped, I can only surmise that the "new" guys in the room had certainly learned the rules: mission accomplished. 

Excelsior!


Tuesday, November 12, 2024

CHOCOLATE BOX WARS INTRO GAME: DANES V PRUSSIANS


Danish Army Command Stand Ready to Be Deployed

Greetings, dear readers.  Recently, I ran a game to introduce Charlie, a member of our gaming club, to Chocolate Box Wars. This won't be much of a battle report, I'm afraid, but it will deliver a general flavor of the action (plus some nice pictures of toy soldiers) and the details of the introductory scenario that I've run with some success. It is designed to illustrate a basic army construct, familiarize players with a common range of unit types and special abilities, and to give experience with the common range of terrain types. I think it may be a useful resource for anyone out there who may be looking to get a first game together. You can download the scenario at the below link:


Read on for a bit more on the scenario and the game. As usual, you may clix pix for BIG PIX in this report. 

It fits on a modest table (mine is 6 feet long by 5 feet wide).  The setup zones are 12" deep (0n a 4x6 table, the setup depths would be 8", as per the rules).  All of the terrain is "Cover" (the ponds are impassable).  The individual trees and fields are for effect and have no influence on play. The rough area does not block line of sight.  

The pre-deployment view from the Danish side. 
The pre-deployment view from the Prussian side.

For ease of setup, I put all the troops on the table in a "staging zone" in front of their deployment zones. This way, players can easily see their force and pull units into their deployment areas. Although there are unit labels on the stands and the players have OOB handouts, I also put a "table tent" behind each unit with identifying information (these get pulled after deployment).  I have found that this last bit really helps to move things along, not only for new players but also for practiced players, particularly if they are not familiar with the army in play. This particular game pitted my mid-century Prussians against my Danes in a Schleswig-Holstein war scrum (my preference is the 1st). But the nationalities are irrelevant (the units would be the same for any match). 

One reason I picked the Danes for this game was that I wanted to get my new Danish Hussars on the table (above left).  Given that the Danish Horse Guards don't get much play, I also decided to put them on the table, too (above right). 
The latter are also conversions: the figures are Northstar Austrian 1866 Dragoons with a green stuff roll added to their helmet crests and then painted to show their distinctive big boots and signature mustard yellow coats. I rated them as regular cavalry in this game

(Left) Veteran CBW player, AJ (of AJ's Wargaming Blog), took up the Danes and Charlie (Right) ran the Prussians. Although Charlie may have been new to CBW, he is very well versed in Iron Cross, from which CBW is derived (albeit several steps removed via its companion WWI version, 1914). Thus, he was familiar with the underlying structure--and played well beyond the "learner level" as a result. 
A closer shot of the Prussian deployment as seen from the left flank, with the two Jager Companies and Squadron of Madgeburg Hussars at the end of the line. The Jager Companies would move into the orchard and the small town to anchor the Prussian left, with the Hussar Squadron in support.  The initial deployment for both sides was fairly conventional, with the main (center) being the line infantry supported by guns with the cavalry and other troop types on the edges. 

Charlie deferred and so AJ and his Danes began the game (left). Charlie then countered, and both sides developed the situation, each conducting a balanced approach towards a meeting in the middle of the area. 
A close up of the Prussian center, with the small town being held by a Jager Company with the battalion of Volunteer rifles (brown jackets) to their left holding the gap between the town and the orchard. 
 
A memorable series of events unfolded when the Danish Horse Guards took advantage of an opportunity to make an audacious charge against a Prussian infantry unit. At this point, General Dice took over (for both sides!): the Prussians were able to react, but did so with minimal effect, leaving the next act up to the Horse Guards, who then balked (they needed a 3 or better on a 12 sided dice to complete the action...they rolled a 2!). It looked like a classic "Death Ride" so characteristic of the era might be in the offing. The even more remarkable thing that then happened was that the Prussians again whiffed in their ensuing reaction. Deciding that fate had spoken, the Danish Horse Guards then turned about and trotted (rather majestically) back to their own lines, making a subsequent rally roll to recover their (slight) losses. 

Another shot of the mid-game action from behind the Danish Center/Left: the Danish Guard (in bearskins) and Volunteer Rifles (Green Hats) come forward to shore up two battered Danish infantry battalions in the center (seen to the right: reduced to a single stand each). Black squares are hit markers. Each stand can take four hits (artillery and light cavalry stands take three).  You can see that the opposing Prussian battalions had taken a beating here as well. The engagement between the infantry lines in the center would be the main action, with the advantage going to the Danes. The coins behind the unit stands are my CBW activation markers. 

Over on the other side of the table, the Prussian right, the Prussian Dragoons would also take an opportunity to ride down a pesky Danish Jager Company, but General Dice would intervene on this side as well and keep them from following through. Unlike the Danish Horse Guards, the Prussian Dragoons would take substantial lumps for their audacity (although there was a window of opportunity, unlike the Danish Horse Guard ride, the outcome of events here turned out to be more consistent with such mounted actions in the post-Napoleonic age of the rifle--and characteristic of the turns of fortune that tipped against Charlie and his Prussians in this game).
The scene afterwards with the reduced Prussian Dragoons withdrawn and the Danish Jagers holding the town with a supporting Danish infantry battalion pressing forward. Eventually, the Danes would take the upper hand and the Prussians would reach exhaustion: win to AJ but very well played by Charlie, particularly for his first time out. 

Gracie, pup #2, ignored the fortunes of war and favored the Prussian side of the table for this game. 

A Few Observations:
Although this was another learning game using the playtest/intro scenario, it did produce a few more insights into the system that are worth sharing.  The outcome was not due to one player necessarily "outplaying" the other. AJ did have more experience in CBW, and that did come out, but it wasn't as if Charlie got run off the table. Neither side had some kind of high risk:reward overbalance in one part of the table. In short, it was an even affair, both in deployment and unit handling. The thing that, in the long run, tipped things in favor of the Prussians was sustainment: although both sides suffered losses, AJ was more successful in rallying off hits at key points to keep units from dropping stands. With the differential in Action Points accumulating with stand losses, the balance started tipping more and more against the Danes. It's not as if Charlie was not aware of the importance of rallying off hits, but he was sometimes wrong footed and unable to do so at the moment when needed, plus he had some odd die results that worked against him. Regarding the latter, having watched these events unfold, I have to say that I am still confident that CBW is not a volatile "dicey" system (where units can sit for half the game failing to activate).  In some of the key rally cases, Charlie really did have spectacularly unlikely rolls (the classic "anything but a 1" roll, but on a 12 sided dice!).  Continuing in the importance of unit sustainment thread, the "Retire and Reform" action came into its own in this game more so than in others. Both Charlie and AJ used it to good effect several times to get units out of bad spots to live to fight another day (well, another turn...).  So, in summary, both played a good game, but the difference was in the overall attrition, which built up against the Danes in the end. 

Excelsior!

Monday, September 16, 2024

DANISH HUSSARS (CHOCOLATE BOX WARS): A RETURN TO THE PAINTING DESK


Danish Guard Hussars of the 1st Schleswig-Holstein. 

Followers (long suffering) of this blog may recall that I basically hung up my paint brushes back in March 2022 with the completion of my Prussian Cuirassiers.  I have done some painting since then, but as planned, it has been small "round out" projects and nothing regular (or major).  Recently, I had reason to unbox my paints and make a mess again after a long hiatus, which is the subject of this post. As usual, you may clix pix for BIG PIX. 
The Danes of the 1st Schleswig-Holstein War were the first contingent I completed for my Chocolate Box Wars (and VnB Continental Mid Century Wars Variant) project.  I have since expanded upon the units in the above photo, but they remain the smaller of my forces. Still, they are the senior contingent, and  as such, they hold a special place in the CBW establishment here in Meanderer Barracks. 

Followers of this blog may also be aware of the conversions and repurposing of figures I've done to complete the various CBW contingents. This was particularly so when I started, and with the Danes in particular. Casting about for figures to represent the Danish cavalry, I used Northstar Austrian 1866 Dragoons for the Danish Dragoons and Horse Guards (more on that in a bit), and the closest fit I could find for the Danish Guard Hussars (pictured at the top of this post) were in the Irregular Miniatures 28mm line...
...the Irregular Miniatures Wars of Italian Unification Austrian Hussar 

I put these Austrian hussars on the Irregular Miniatures Prussian Hussar horses/horse furniture, and then free handed the details to represent the Danish Kit. Not a bad result, I think. As new figures became available, however, I found myself "upgrading" my original CBW contingents...
...for instance, my initial Prussian cavalry contingent were all Foundry figures (above). But as Northstar expanded their line, I went with more contemporary figures...

...painting up new Dragoons, Cuirassiers, and Hussars (also uhlans, but those were new and not upgrades). 
Eventually, Northstar produced some Danish Dragoons (left most unit in the above), and I added them to the Danish horse. So, three out of four of these units were contemporary figs (the red coated dragoons and the yellow coated horse guards are the conversions of Northstar 1866 Dragoons). Thus, I thought it was time to cast about to see if I could upgrade the Danish Guard Hussars to better fit in with the others. And so I began to look about...
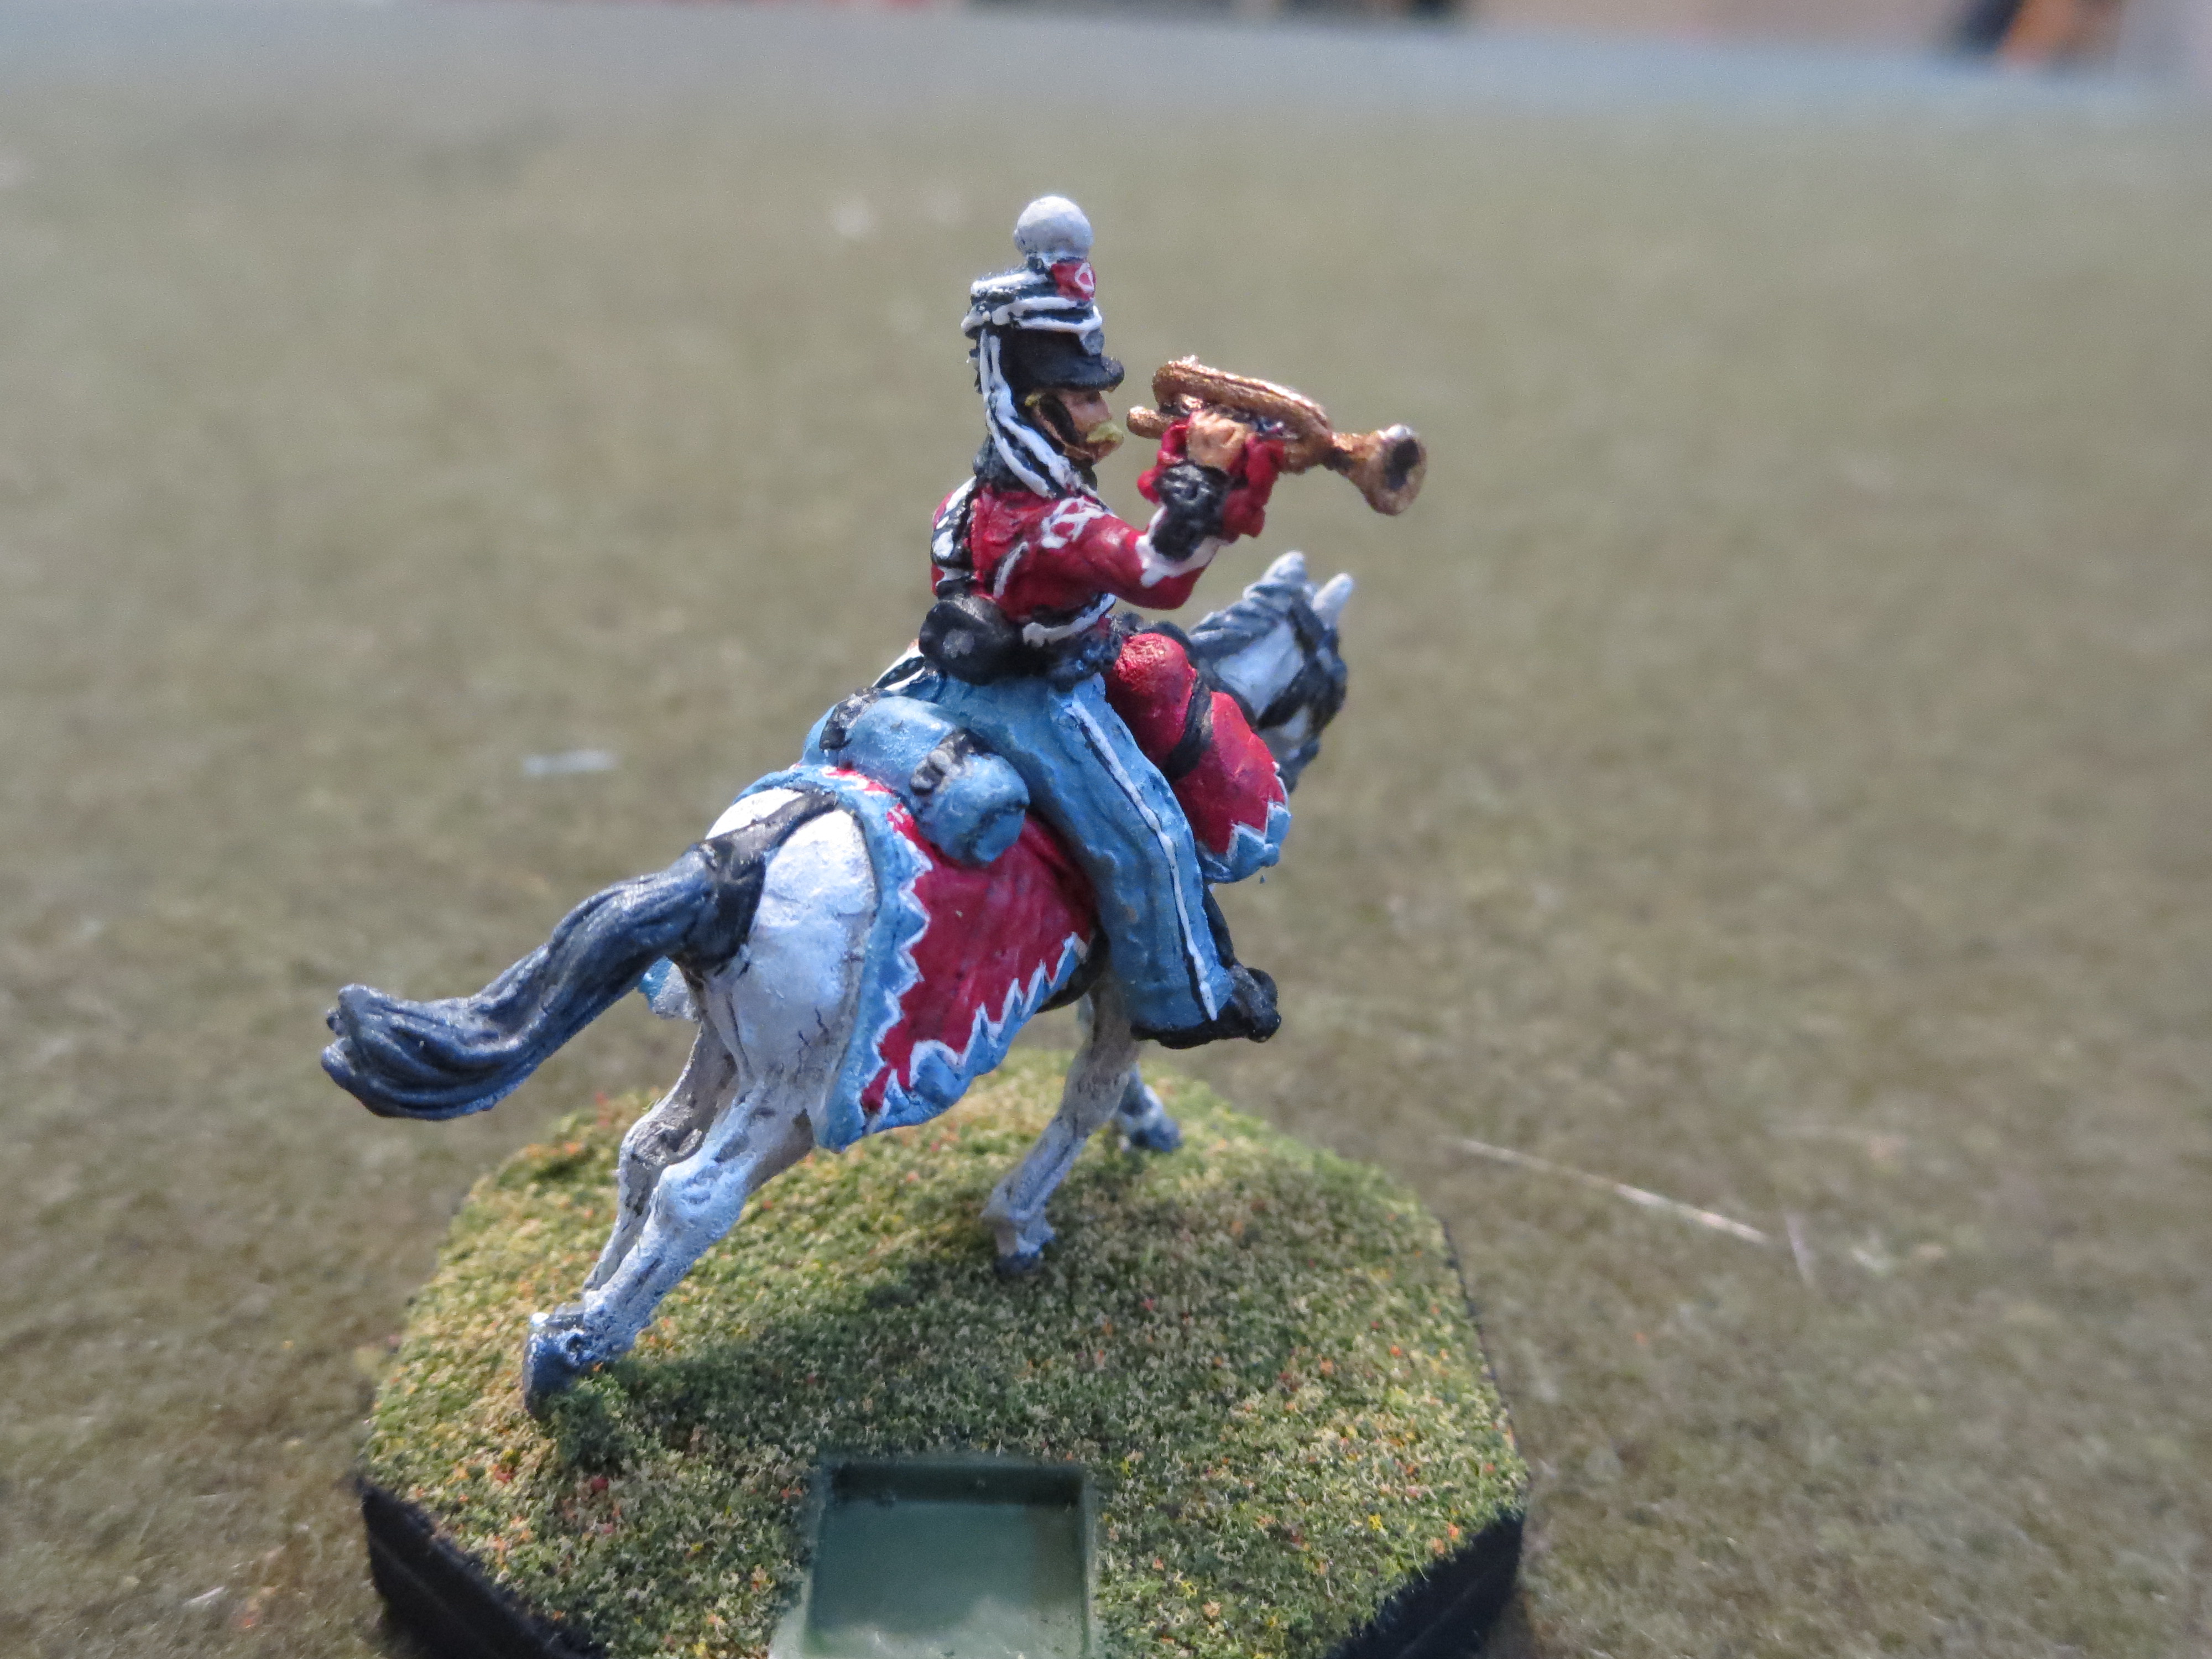
...and I found some additional information and references (first of all). The above images come from a Danish Website (worth a look).   According to one source, I  read (I forget where) that on campaign the Danish Hussars wore either the Attila (the blue jacket in the top picture) or the Pelisses (the red fur lined jacket in the below), but they did not wear the pelisse draped over the shoulder in the Napoleonic style. Thus, if I could find hussars wearing the pelisse, my upgraded hussars would look very much like the trumpeter above: red coat, blue trousers, bold horse furniture, very cool. Now, to see if I could find figures (because nobody makes these, of course)...
...and checking into the Perry Metal Napoleonic figures, I found these Danish Hussars (1813/14) wearing pelisse in the  Danish Norwegian Army. The shako is not quite right, and a bit busy, but otherwise, close enough to work with. Here's what I did...
I picked up the command and trooper attacking packs, and I snipped off the plume, leaving just a bump there, upon which I then sculpted a pom pom out of green stuff.
To get the lines of the mid century trousers, I shaved off the buttons on the coveralls and smoothed the legs.  
For the officer, I clipped the plume a bit, and then added the hanging plume using green stuff (something I got plenty of practice with when doing my Russian Uhlan conversions). And here is the outcome...
The stand with the Officer and trooper. 
I brought out my Hungarian Knot shortcut to add a sleeve loop to the officer. 

A few detail shots for anyone who is interested in these figures. I must say that in naked metal, I had to study them for several days to understand what I was looking at and how to approach them.


To bring out and make distinct the complex lines of the strapping, shako cords, flounders, buckles, buttons, and braiding, and to help the white stripe on the light blue trousers stand out, I used my underpainting method (also known as "lazy man's blacklining"). I first painted these details black and then went over them in white or metallic,  leaving a bit of the outline to delineate the features from one another. The pom poms are actually light gray as opposed to white: not something you notice explicitly, but something that helps with the look of the figure. On the shako, I only painted the long cording consistent with the latter uniform white, leaving the other cords black with the shako. There is also a thin wash of black and a drybrush of lighter red and lighter blue over the uniforms and saddle blankets (again, not heavily done, but enough that they don't look block painted). The fur edging on the pelisse, the officer's hanging plume, and the horse tails and manes are black with a drybrush of "gunship gray." The horses were done first in burnt umber then drybrushed with burnt sienna--and then given a light blackwash and drybrushed lightly with burnt sienna again.  All paints are flat enamels (Model Master, Testors, Humbrols, and True North). 

The Unit:


Getting a consistent look across the sabreteches and the edging on the shabraques took some doing. I spent as much time painting the horses/horse furniture as I did the riders. But the small figure count of the Chocolate Box Wars system allows for this kind of attention: I don't think I could have maintained this level of control for 24 figures!


A set of non close up views: what the unit looks like when seen at gaming distance.

A demonstration of the difference between the contemporary Perry figures (left) and the original Irregulars--for which I still maintain a soft spot. They will assume their proper place of honor alongside the other figures I've retired. 

Being the senior contingent in my CBW forces, I added a separate trumpeter command figure, something I have done for my Prussians, Austrians, and Russians. 
The new Guard Hussars take their place alongside the Horse Guards in the Danish Cavalry Division, now led by a trumpeter command figure.

Now the Danes have a hussar unit with figures that can stand up to their Prussian counterparts on the table. 

Excelsior!

Related Posts Plugin for WordPress, Blogger...