An earlier "How To" post ( Ed M's Basic Basing ) generated some interest in my marker systems. In this post, dear readers, I will follow up to provide more information on those.

By way of quick review, I have metallic strips on the back of most of my bases where I can put magnetic markers. As I mentioned in my earlier post on basing, I don't try to hide this function, but incorporate it into the style. I think that providing readily available game information boosts playability a great deal. These markers coupled with the reference sheets I produce combine to present most nearly all the game information players need, and puts the information right in front of players in the context of the situation on the table. This allows one to run games that might be a bit more involved than might otherwise be possible. To make all of my graphics, I use the universally available (and dead simple) MSPaint, which is bundled with most windows operating systems (although I hear it will be discontinued in the future). So no need to learn or buy any special graphics program to replicate this madness. Producing these markers is a significant project, I have to admit, but I consider it a valid one--no less so than the other projects we take up in this hobby, like painting figures or making terrain. However, once done, these markers are most handy and have become central to how I run games.
COLORED MARKERS WITH UNIT INFORMATION (NUMBERS/LETTERS)
This is my most versatile system. It consists of several sets of color coded markers and sets of white on black informational markers (numbers, letters, etc)...
...above, two sheets of markers (there are more). Colored coded markers on the left and a set of numbers and unit information on the right. These markers are 1/4" square. For anyone interested I've posted a complete set of markers that you can review and download.


The unit information markers (above left) I print out and put on peel and stick magnetized sheets. These are thinner than the colored markers. This works well because these markers aren't going to get handled during the game. The colored markers (above right) I put on thicker magnetic strips (which can be got at most craft or DIY stores)--these get handled during the game, so being thicker helps with that. The magnetic strips come in 1/2" widths, which is particularly handy since you can fit two rows of the 1/4" colored markers on them, which lowers the number of cuts you need to do to create the markers once stuck onto the strips. After sticking all of these to the magnet material, I then use a pair of scissors to cut them all out (lots and lots of little squares: a good project to do while watching or listening to a favorite sports game or podcast--it only has to be done once).


Storage and organization are important to help make these systems viable. I put my color coded magnetic markers in metal DVD cases (you can buy these by themselves) with a paper strip on the outside indicating the colors.
For my unit information/numbers and letters, I use a clear, multi-compartment container.
An example of the markers in play. In this case, the colored markers represent strength points and command relationships. To the left, a three strength point, morale five light cavalry (5 L) and a to the right a four strength point, morale five infantry unit. They both have the same color markers (black), which indicates that they are in the same command. The artillery is a two strength point, morale five field gun (5 FLD)--the white crosses on green markers represent an army-level unit. You can see the thickness difference between the strength point markers and the unit information markers.

Here is an illustration of a complete system for a two battalion Polish Napoleonic Regiment. Each battalion has strength point markers in a unique color. Some strength point markers have "S" indicating, that it is a skirmish point. The regimental command stand (the oval mounted figure) has a marker identifying each of its subordinate units. The empty base at the back substitutes for a roster system. It tracks the regiment's exhaustion level (the yellow and brown marker--once the number of hits reaches that level, the command is exhausted). In the upper left hand corner are markers representing the component units of the command. When a unit in the command takes a hit, the strength point marker is moved from the unit stand to the tracking stand. When the total reaches the exhaustion level, the command is exhausted.

The above system in a different game. Here, pre game, there are four Prussian brigades arrayed with their tracking stands beside them. In this case, each command is only one color.
The same Prussian brigade as it enters the table. You can see that the tracking stands have been placed out of play on the edge of the table for reference.
Following from the same example, an illustration of how the markers help to differentiate the commands in action. You can also see that one of the stands in the yellow brigade has lost two strength points (those are back on the tracking stand).
For the tracking stands, I put a 3"x3" metal wargame base (spray painted green) on a 3"x3" wooden wargame base. I also made up a set of magnetic tracking markers (above right).
When not used as tracking stands, these bases can also serve as sabots to allow me to use my individually mounted figures on unit bases (the figures have magnetic bottoms).
The color coded markers are also useful for other systems. In the skirmish game above, the individual figures have markers indicating which unit they belong to. As I said before, I get alot of mileage out of these markers.
SPECIALIZED LABELS
I have made specialized markers to support specific game systems. In the above case, it is our group's Napoleonic Rules, Napoleon's Rules of War.
You may need to click the above to enlarge for clarity. These labels were important aids to help facilitate play in the mega-game that I ran for the club.
A French Division Marching In
In the above, you can see that there are two French divisions operating in the area (the black labels at the bottom and the blue in the middle ground).
So the labels helped to present low level game information and they helped to visualize larger unit organizations on a crowded table.
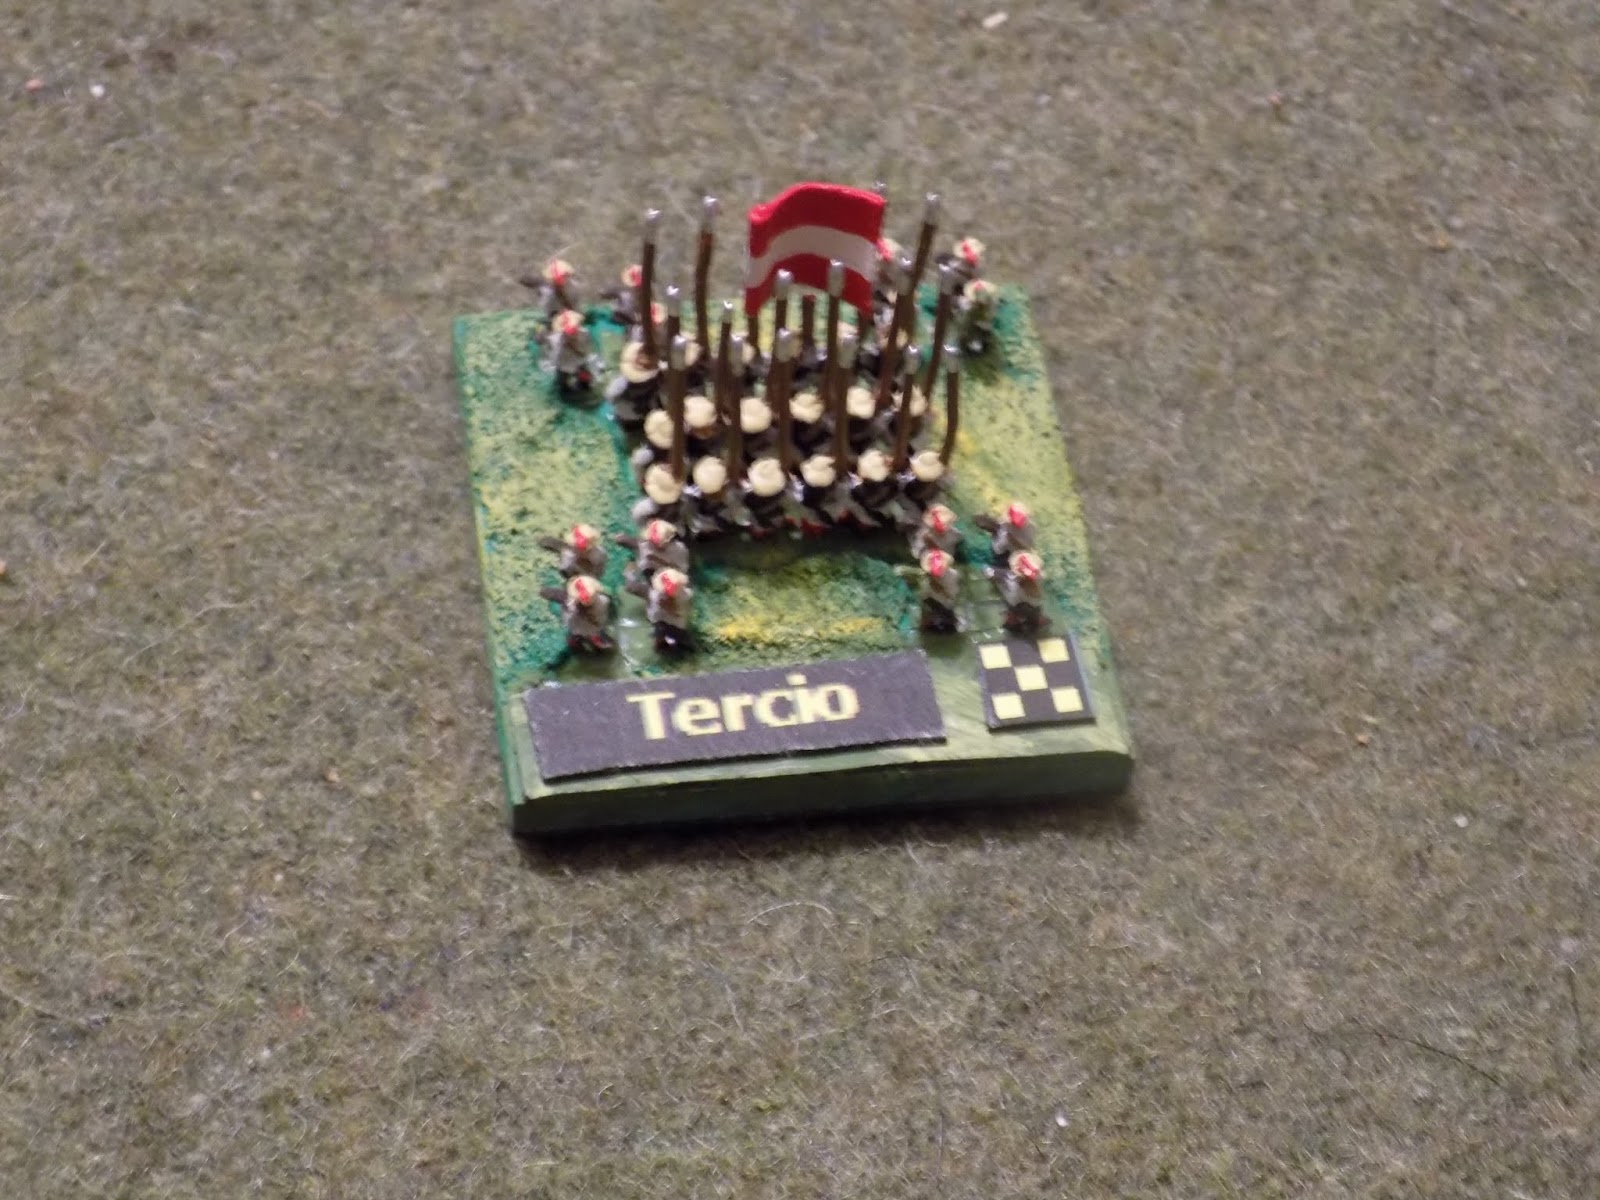
6MM MARKERS
For my Baroque Battles system, I produced a set of magnetic labels to indicate the unit type and the morale grade. Instead of numbers, I went with dice symbols. The above is a morale five Tercio.
An example of the Baroque Battles labels in play. I will (eventually) be posting the rules and other files for this system on the content page. For now, here is the QRS (for the curious).
WOODEN PLUGS
Finally, in one of my earlier efforts, my Smalle Warre collection, I used wooden plugs as unit markers.
Units consist of 10-12 individually based figures. I put a plug on the back of each stand, with each unit being color coded. Each figure within the unit is numbered (hand painted: I now appreciate calligraphers and their craft!)--the command figure is left blank, with no number. Numbering allows me to also use these figs for lower-level systems where individual figures might need to be tracked, such as my Loot the Baggage Train game.
And that, dear readers, is enough for now (I think you'll agree!) on my obsession with unit marker systems--just remember, you asked!
Excelsior!


A very clever and useful system you have, Ed. You are a very organized gamer.
ReplyDeleteThanks, Jonathan—it all started with the (now lost) idea that my collection would be small and thus need to be stretched for multiple uses.
DeleteNicely done.
ReplyDeleteThanks, Norm.
DeleteI think your markers have form and function. I actually like labels on a game table that aid in recognition of status and chain of command. They need to be visible enough to be easily seen but blend in enough not to distract.
ReplyDeleteYours do the job admirably. 😀
Hi Stew—I think that some of the contra-label sentiment stems from cases where they’ve been badly done, aesthetically or functionally (or both).
DeleteA very interesting post Ed...
ReplyDeleteYou are clearly way way more organised than me...
All the best. Aly
Thanks, Aly. Ironically, all of this up front investment by the "project" me makes life easier for the lazier me who runs games. We get along nicely :)
ReplyDeleteNice and neat labeling, unfortunately lazier me is both the prep and player in my case!
ReplyDeleteBest Iain
Thanks, Iain: I'm sure that in the end we all wind up with similar investment--just a matter of where.
Delete